Showing posts with label Pinto. Show all posts

Sunday, April 24, 2011

The coolest moped part I've ever made.

Well, DEATHped is finally coming near to completion. The final missing pieces are in the mail, and I am just putting the finishing touches on the bike.

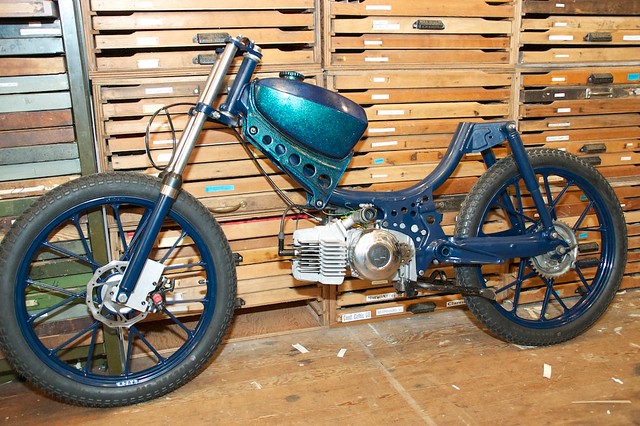
About three months ago, I started visualizing what seat would look best on the bike. I wanted it to be like a cafe seat but minimal, totally unique and sturdy. I started by making a small paper mockup about an inch long. I just sort of figured out what sort of folds I would need to do to make it work. Once I had a mockup, I disassembled the little paper seat and scanned it into my computer. I traced the template in Illustrator and extrapolated it to full scale. Then I printed out the template onto a cereal box, assembled the full size mockup, and tweaked and refined ad naseum.

IMG_6554

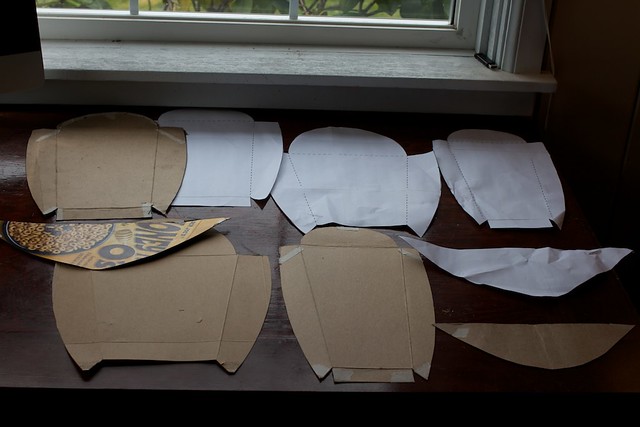
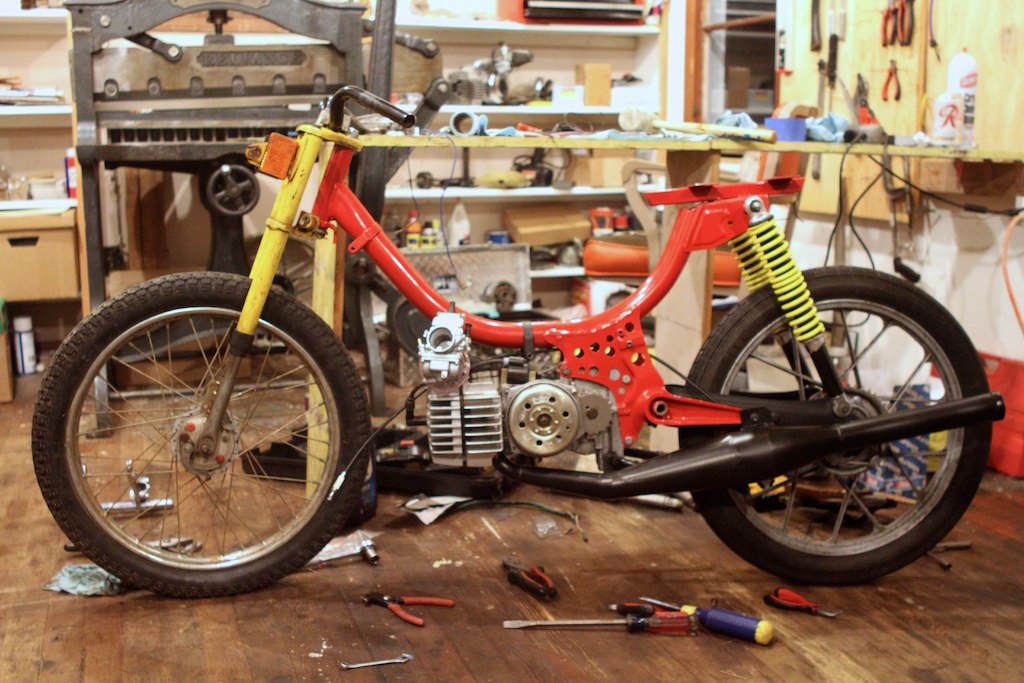
It's really nice to be able to set a cardboard facsimile of a seat on your bike and scope out the lines and work it out. Eventually, I came up with a design I was happy with.

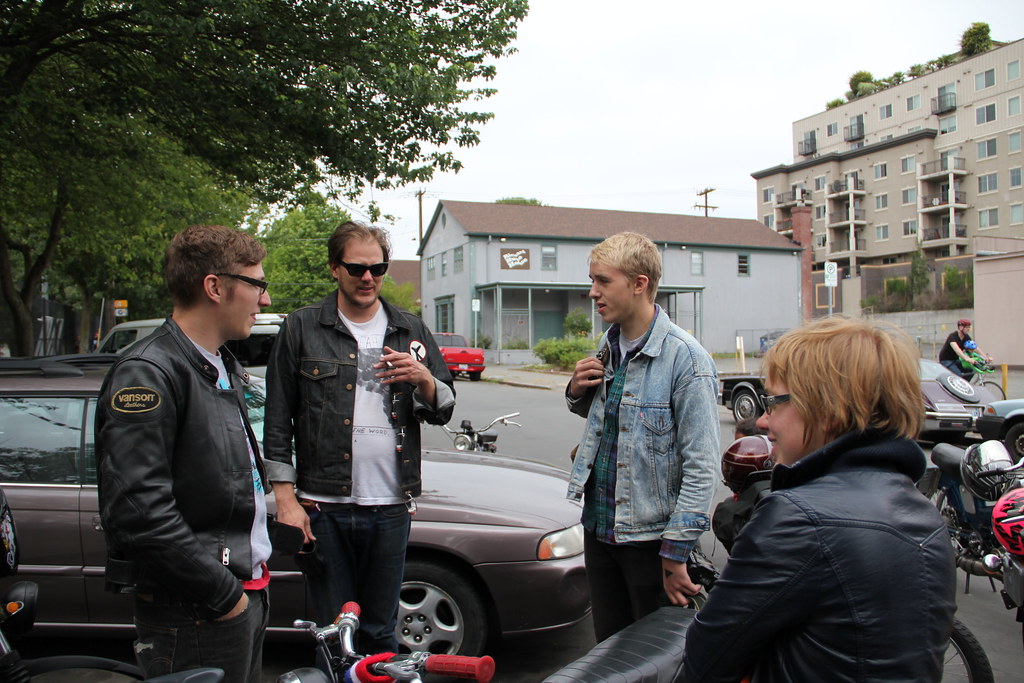
On Saturday I was lucky enough to get some time with Michael Mike down at the wizard lair. That guy is super generous with his time and skills and most every amazing moped project coming out of Seattle has his fingerprints on it. I filled him in on my plan and we quickly set to work.
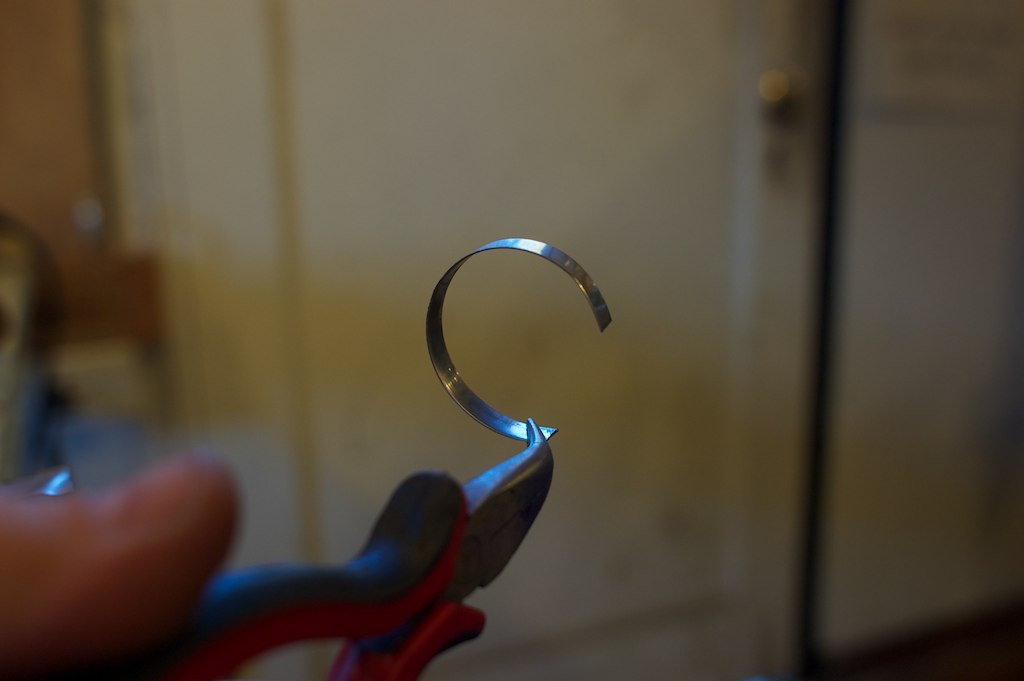
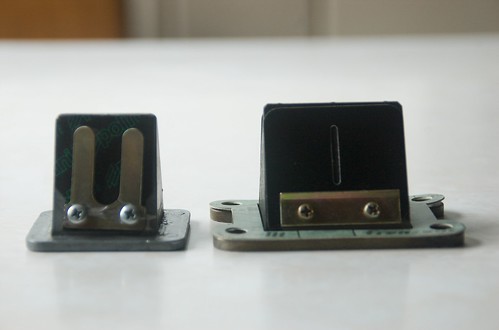
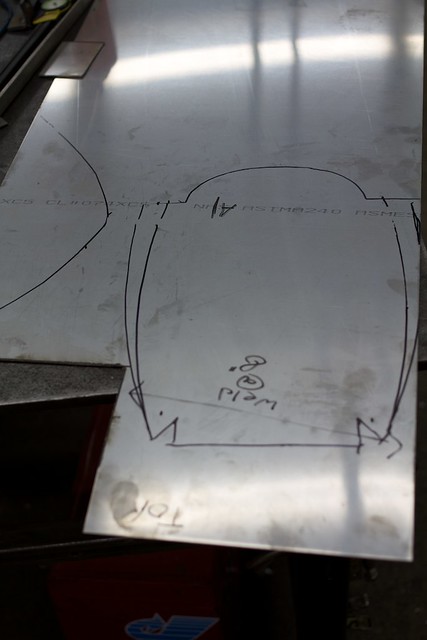
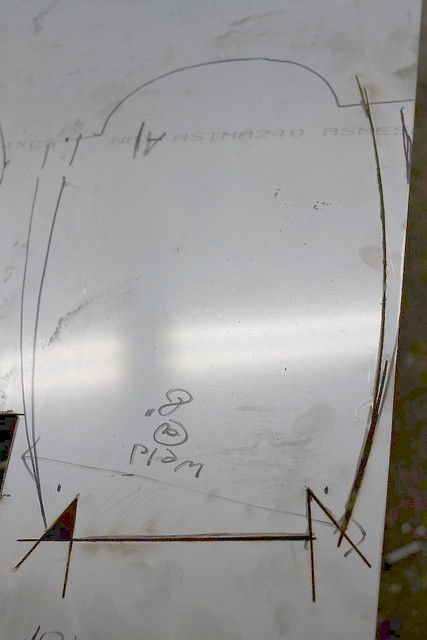
First I transferred my template to the stainless steel.
IMG_6532

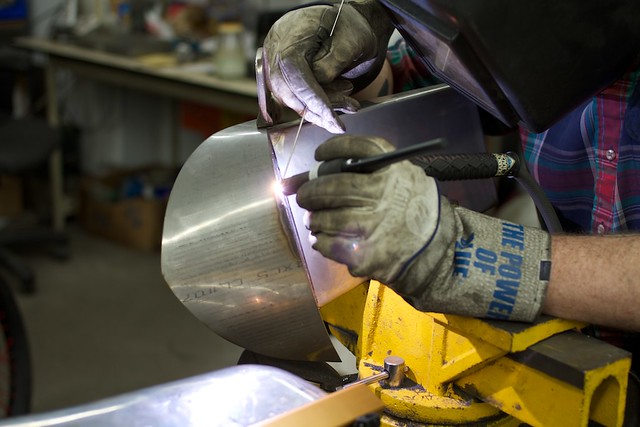
Then I started hacking away with an angle grinder.
IMG_6534

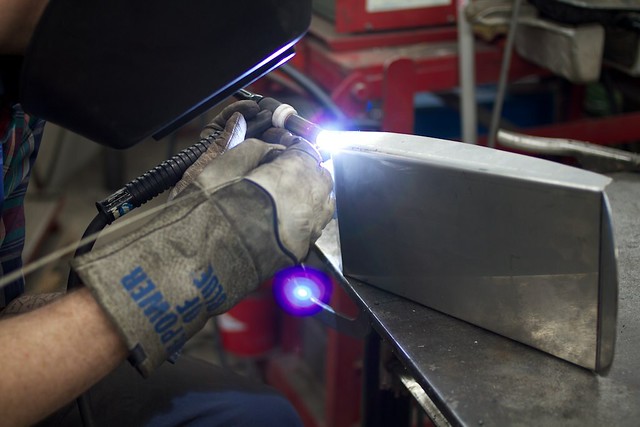
The Wizard himself began fusing the metal. If you look closely you'll see that he is actually absorbing the energy of the welder into his hand and welding with his magical fingertip.
IMG_6535
IMG_6536
IMG_6537

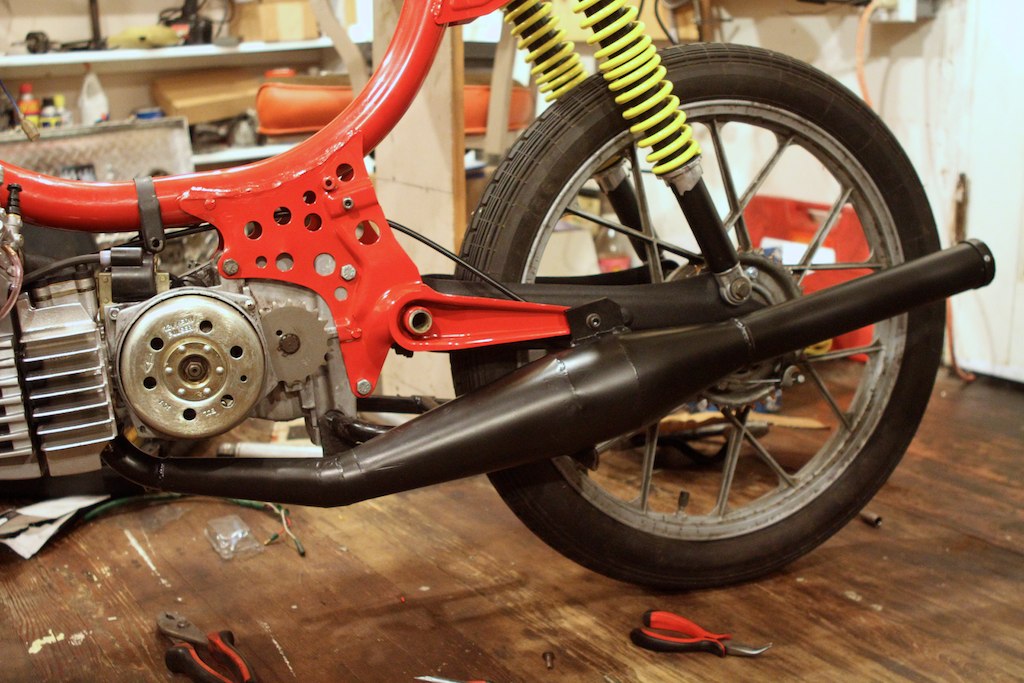
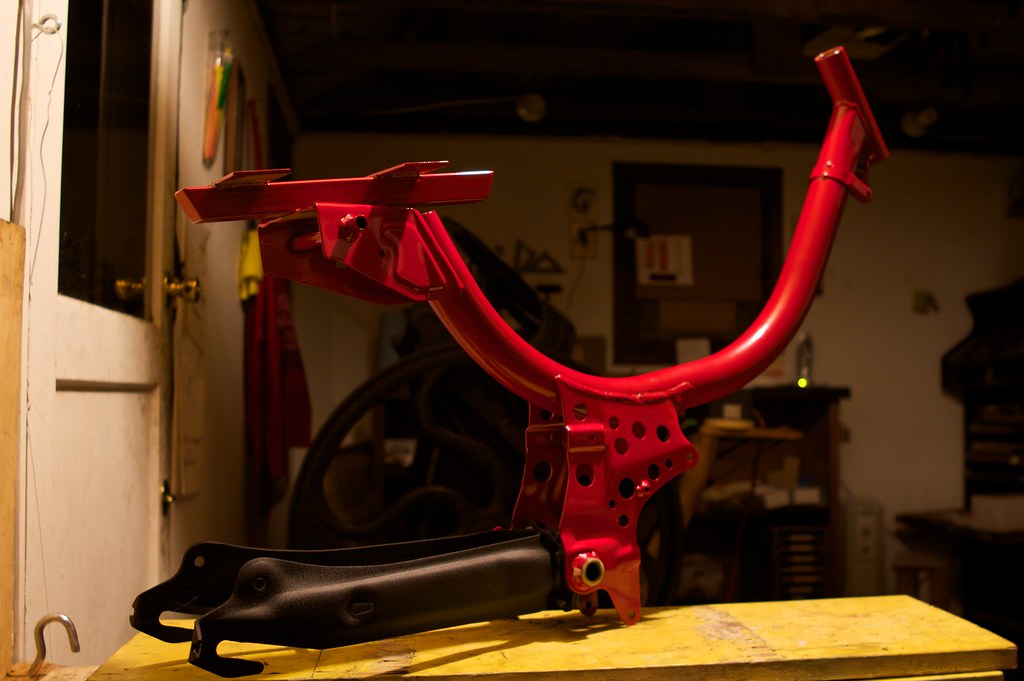
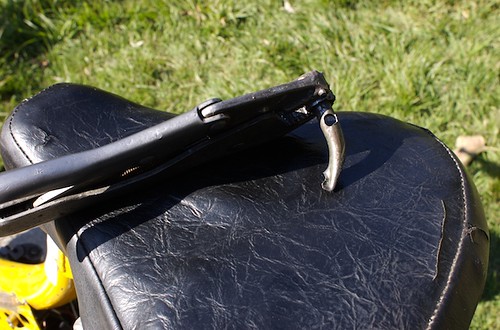
After the welding was done I spent a significant amount of time shaping the tail section and this is what I came up with.
IMG_6539
IMG_6541
IMG_6544
IMG_6540

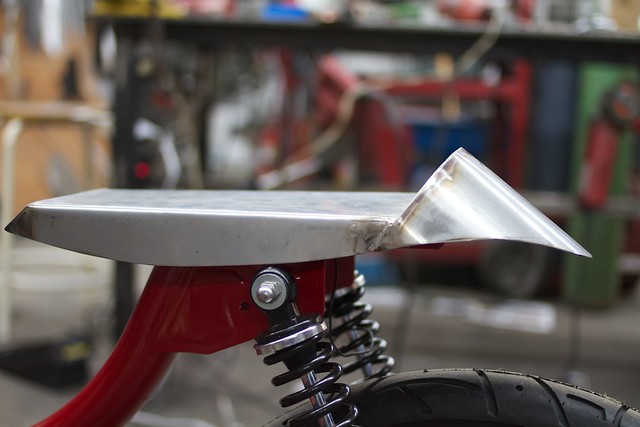
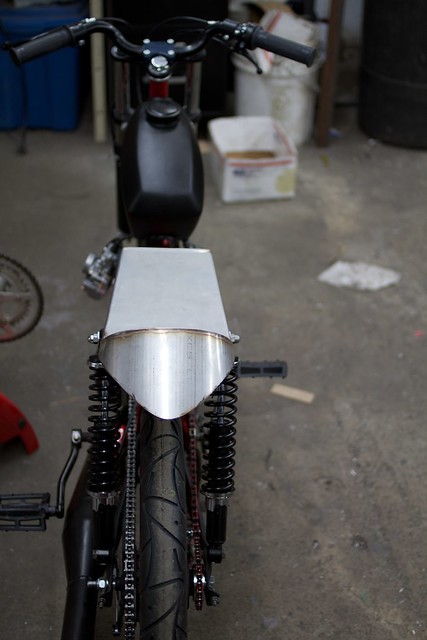
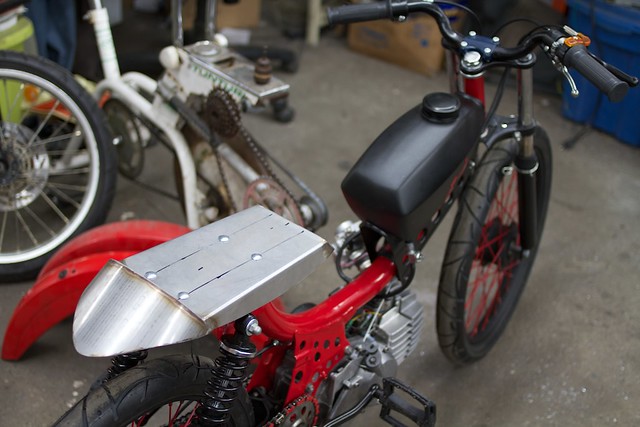
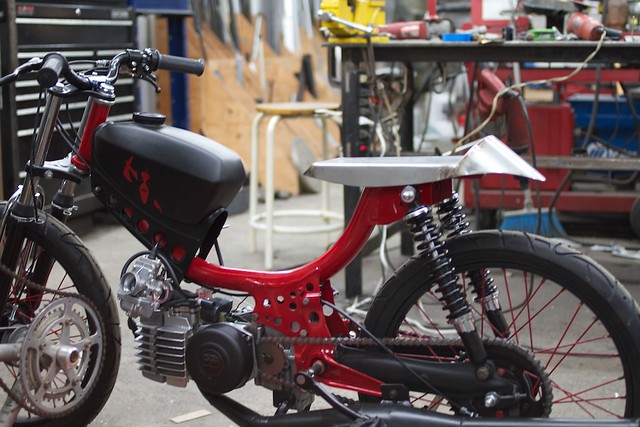
I'm pretty proud of it.

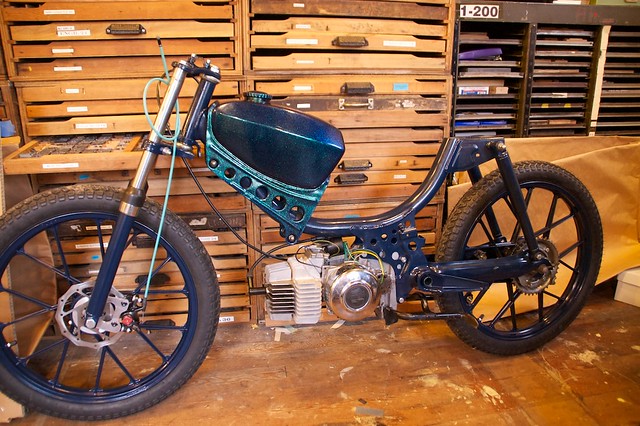
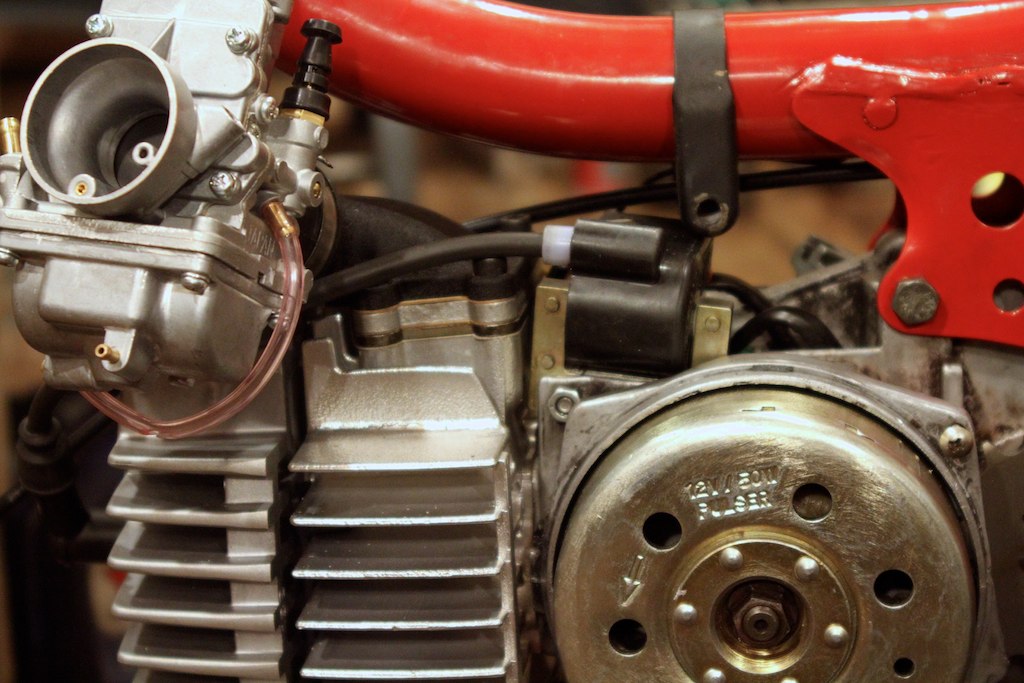
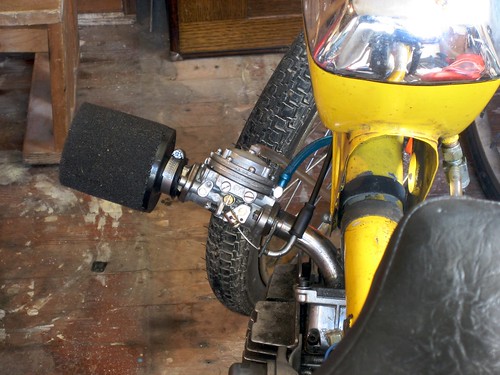
So this leaves me with only a couple more steps before I can declare DEATHped complete and ready to ravage. I'll be tuning the carb and clutch over the next couple of days and my final little bits should arrive today (monday). All that is left is to black out any chrome, (DEATH TO CHROME!) and take pretty photos for posterity. I'm very excited.

I just have to mention one more time that I couldn't have done any of this without the generous help of Michael Mike, Phil, Haulin' Colin, my supportive wife, and probably other people that are escaping my memory.

Wednesday, December 29, 2010

Meat and Metal.

I've been doing a lot of grilling lately and I've tackled some new meats. For example, earlier this month I've cooked a brisket, two pork shoulders, baby back ribs, and made a really awesome stew.
Here are some pictures of the ribs:
DSC_8511
DSC_8514
I feel like I've learned a lot about how meat cooks from a chemical standpoint so it's been pretty fun. Also, for christmas Rosanna got this cookbook for me.

It's a really great book, it is a series of interviews with butchers and a couple of their favorite recipes. I think I'm going to make a tenderloin this week.


A couple of days before Christmas I went with Matt Smith down to the hinterlands of washington, I'm not sure where we were but I do know that we crossed the tacoma narrows bridge. We were on a rescue mission to pull an old dock out of the lake at his family's cabin. Here is "Man" Smith pulling the dock using only his pinkies.
DSC_8852

The mopeds are still coming along nicely. I went to the wizard lair to do some serious damage on the mermaid bike.
I cut the forks down 2.5". Naz welded them and I think that it improved the stance a lot. At least now it doesn't look quite so American Choppers.
Before:
DSC_8747
After:
DSC_8892

I got the disc brake properly spaced and I cut a bunch of material out of the caliper bracket, it's looking pretty sexy now.
DSC_8894

DEATHped still needs forks, I've put so much time and care into getting this bike just perfect, it would be a shame to put some plain EBR's on it. So I'm saving for hydros. The rear end is pretty much done, I just need to put on the rear gear and then the chain and a taillight. I'm not sure how I feel about the red and black pedal chain. Too much red? Nah, it's appropriately obnoxious.
DSC_8895

As these bikes come close to completion my mind starts drifting towards the other projects. Do I immediately start souping up the hobbit? I have two puch frames now (a chopped maxi and a wierdo colorshift pinto), should I build another puch? Should I slap a polini on the derbi? Rebuild the Hercules so Phil has a running bike to ride in Seattle? Only time and monetary concerns will tell.

Wednesday, November 24, 2010

Making a disc brake.

A while back Rosanna was riding old red and gold maxi and kept mentioning how bad her brakes were. I must admit I didn't consider her concerns to be in urgent need of attention until I had an opportunity to ride the bike myself. What she described as "doesn't brake very well" was in reality a complete lack of brakes. It was a truly hair raising experience. I tried a few times to improve the brakes by sanding down the drums, putting in new shoes, changing out the brake lines, nothing seemed to improve the situation.

So, when Rosanna hatched her plan to build a custom Pinto, I was determined that her brakes be over built. I want her to be able to stop on a dime. So while many people are adapting motorcycle disc brake setups, I thought that I would adapt a mountain bike disc brake setup. There are a few reasons for this:
A) Bicycle disc brakes are relatively cheap.
B)The calipers come in very good quality cable operated versions. My plan is to use the stock moped levers.
C) The challenge, man!

The first task was to make an insert that would replace the existing brake hub. I managed to purchase some aluminum stock from online metals for about $10. I headed down to the wizard lair and turned the insert, drilled and tapped it. This was certainly the most time consuming part of the process.
DSC_8623
So as you can see here, I have drilled and tapped for the disc, and I have drilled and tapped the insert to keep it from spinning on the hub.
DSC_8621
And then here you can see Rosanna's beautifully powdercoated wheel has matching mount holes.
DSC_8622
Here are all the parts. Up in the top right corner you can see the bracket I made for the caliper. The round hole mounts on the axle and the slot goes on the existing brake stop.
DSC_8625
I still have a little bit of work to go before this wheel is complete, spacers need to be cut for the bearings and the hub insert and the brake caliper. But now that the wheel has been powdercoated we are a lot further along. Exciting!!!

Thursday, October 7, 2010

Converting to sealed bearings

Converting loose bearing wheels to sealed bearings has always been a difficult and time consuming effort for me. But I really think that if done correctly the product is worth it. The leleu wheels that I am using have an OD of 29mm. That's a problem because the bearing sizes I want come in 28mm or 30mm.
Yesterday I stopped by the wizards lair and asked phil if they had any pipe I could turn in order to make a shim for 28mm bearings. If you were keeping track that would mean I'm making .5mm shims. That's small and probably too difficult to turn in a lathe. Phil suggested I go get some shim stock. I didnt know that this stuff existed! It's great. I was able to stop by online metals and pick up some .5mm shim stock and since it was scrap they just gave it to me for free.
DSC_8340
Anyway, I got the shim material, cut it down with my dremel and trimmed it fit.
DSC_8343
All in all it's been super simple and easy. I still need to use some red loc-tite to seal it in place and I need some length of pipe to keep the bearings from being pulled in on each other.
DSC_8344
DSC_8348
The bearings i used were 6001zz. With this setup I'll be running 12mm axles. Stoked!

Monday, October 4, 2010

DEATHped progress

I'm back from Catalina for a few days so I've been working hard on the DEATHped. Man, with a name like that, it would be a real shame if I actually died on it... anywhoodles, it's coming along swimmingly.
I started by meticulously cleaning and assembling the engine, then I wanted to see how it would look with the yellow sebacs I had laying around, and then I figured I should throw some wheels on it to check the stance, and now it's actually looking like a moped. Amazing!
IMG_4495
I am for sure not going to use these wheels or these forks, I'm waiting to buy some black EBRs, (unless some benevolent soul wants to give me some?) and Phil is currently powdercoating some spokers for me.
Phil said that he would work on perhaps getting me my wheels this evening. Fingers crossed.

It is really nice to build a bike without rushing it. I can disassemble and reassemble things as I discover issues rather than building it with my usual, "I have to get this done tonight or I won't have anything to ride!" For example I don't want any wires showing if I can help it, so I drilled a tiny hole in the frame near the motor mount and that is where my taillight wire pops out. Another pet peeve of mine is when someone does a meticulous and beautiful pinto build and then bolts the coil right above their front wheel. Like this:
Gross. So I spent some time figuring and I managed to bolt my cdi coil onto the case nice and discretely. There is a small section of case that sticks out like a tab in-board of the flywheel. I just drilled a mounting hole and bolted it in.
IMG_4498
And lastly, here is my motomatic N8p all bolted up. They made me this pipe way back in the day and it had gotten really dented and gnarly so last year when we headed to the Latebird Invitational I dropped it off for a restore. They did a great job. They replaced the header, angled the flange to fit a gila, took out all of the dented sections, and generally cleaned it up, as well as giving it a nice new powdercoat job. Their fit tolerances are perfect. I told them it was for a gila on a pinto frame and the mounting bracket fits just right. Also, I'm a big fan of pipes that kick up a little bit, so this thing really makes me happy.
IMG_4500

Oh yeah, I threw those sebacs on there. I can't decide if they fit or not. I was starting to feel that when this thing is done there might be too much red and black so the splash of yellow might be a racy contrast. Any thoughts? Bear in mind that I'm color blind so most of the time my color choices are cranked to the max.

Saturday, July 24, 2010

It's summertime!

DSC_7841
I love this city. And when summer eventually arrives, Seattle is glorious.
DSC_7846
We've been going to Gas Works park.
Matt Smith contemplated his former life as a world traveling mariner.
DSC_7850
We had a fantastic rally. A lot of friends came to visit.
DSC_7841
Thanks for the photo Chris.

I just got my pinto frame back from Responsible John, and boy does it look sweet.
DSC_7850
This bike is going to look really mean. Little children will cry when I ride by and my neighbors will stare in horror as I run over their animals and the sound coming from the exhaust pipe will lay waste to all glass within one mile.
Travis says that he is going to build one just like it but with reverse colors. The only problem is that he keeps calling it Cherry Red. This is Mirror Red. Geez get it right, Travis.

Sunday, May 23, 2010

Gila kits are crazy. and awesome.

The dual Kvernmo Pinto projects are coming along slowly but surely, every day a little closer.
Recently I bought a Gilardoni kit. These things really are beautiful. They have a HUGE reed cage and just really nice finishing all around.
Gila Reed hole
gila reed cage
gila ports

And look at the difference between the gila reeds and the 4 petal polini:
polini reed cage, gila reed cage

I took these photos this morning with the intention that the crappy pictures on the moped army wiki of puch kits could be updated, do you have a puch kit and the ability to take pictures that aren't blurry? Help me, help the wiki.

Friday, May 1, 2009

Fixing Fixing Fixing

As often happens here at Castle Kvernmo, we have recently run into a veritable moped apocalypse. A steady trickle of things breaking, bending, and rattling off has rendered all of my bikes unridable. (Oddly enough Rosanna's bike is still running strong with nary a flaw.) As I am currently one of the elite persons rich in time and poor in finances, I had to get a bit creative with my moped fixing approach.

First up, the Hercules. This bike is usually a fairly rock solid bike but lately has been showing the results of my daily abuse. I recently noticed that the brake pull rod was bending.

Here's a picture of the poor guy:
janky4

As you can see, the rod has been bent due to two things,
1. My vigorous and often excessive use of the rear brake
2. The lack of a proper pivot piece in the brake arm.

When the brake is pulled the rod needs to stay in a straight line and still allow the brake arm to pivot independently. The pivot piece was never on the brake plate when I bought the bike so I just went without. As you can see, it wasn't a good idea.

So, it's time to make a new piece. The proper way to do it would be to machine something out of aluminum. However, I'm trying to fix it now, not later, so I improvised. After putting around my shop for a while I found a section of brake line that had come out of my doomed Chevy van. It's sort of thick metal and I decided it was worth a shot. So I dremeled the ends and drilled a hole, and voila! a new pivot.

Before:
janky2

After:
janky1

I also worked on the Pinto a bit and got the cdi to work with lights and a horn! Check out the video for more on that...

Janky fixes from Joel Kvernmo on Vimeo.


Also, apparently I broke my stabilizator.
janky7

Wednesday, April 22, 2009

Failure failure failure...

I find myself often ignoring the idea that a stock moped is a dependable moped and a souped (suped?) up moped is likely to be faster but exponentially more likely to break. Why do I do this? Because I'm an idiot that's why. Get off my back, what have you done lately?

Since slapping the Pinto together I have had moments of glory within ages of pure chagrin. Lately, the quest for glory has been to install the new cdi that treats has recently come out with. So far I have spent about a week dicking around on it, timing it, trying various cdi controllers, installing a proper kill switch, etc. I have managed to get it running, however, the incredible performance increase that I was hoping for has actually manifested itself as a mediocre performance decrease. I get about 5-8mph less top speed than I did before and my low end is worse. Hmmm.... I don't think that the fault lies within the unit itself, I suspect that I'm probably doing something wrong and have lately been considering a full breakdown and build up of this bike from scratch.

One major performance issue has been a top speed surging. When I hit the top of my power, rather than it just sort of hanging out there, the bike surges and loses power until I lay off on the throttle a little bit. It was exhibiting this same issue in L.A. and I thought that it was perhaps an issue with the Tillotson carburetor. However, Michael Mike, the mechanic whose example I usually follow, has not seen this problem in the nearly identical setup that he built so now I search for the root of the issue.

A) Fuel Flow
Perhaps I am just not pushing enough fuel through my carb. My petcock is fairly janky and so maybe when I hit the top speed I'm simply not getting enough fuel pushed through the carb. I had a little fuel pump kicking around my shop so last night I thought I'd throw it in there and see if anything improved. I tied it in to the pumper line on the bike and also tied in the fuel line and it didn't seem to effect anything negatively... until this morning when I couldn't start the bike at all. I suspect that over night the carb drained dry and now I need to prime the carb prior to starting it so that I have some suction. Lame. The problem is that I couldn't prime the carb and start it in place because I munched my pedal chain tensioner and had no pedal chain. The fuel pump also didn't seem to effect the surging issue so for now I'm thinking it may not be the fuel flow. Unless it's the petcock that is causing issues...

B) Dented up header on the pipe
My pipe is in pretty bad shape. Not so horrible that it won't run, but it certainly isn't helping things.

C) Seized up blued up kit
My 64cc polini has treated me pretty well if you don't consider the three times it's near-cataclysmically exploded on me. I've replaced the piston once, and the rings twice. It CAN go fast sometimes, but I feel like when you are making fine adjustments on a every other piece of equipment and the main hunk of metal that produces the power looks like it's been chewed by truckasaurus... it might be time to throw in the towel on ol' polini power and buy a cheap kit that I can hack on. "Rosanna, I need to buy a new kit. Do we really need to eat this month?" Probably will not happen for a while.

I think my issues come down to this truth that Responsible Jon so eloquently stated, "Kitted mopeds are only reliable if you are willing to replace EVERYTHING. Even the things that are sort of still working." Essentially, if I want to continue using this crap bucket as a daily rider, I'm going to need set it aside, ride my stockers to work and back and spend time and money slowly on the super bike, taking my time to figure things out instead of plugging the sieve holes one at a time.

I'll illustrate this post with photos of my blued up parts later.

Monday, March 16, 2009

Crazy weather? Friends out of town? Sounds like a fixin' day to me!

So anyway I attacked my stack of mopeds like a mom shopping for cabbage patch kids. (anyone else around in 1983?)

A month or so ago, I was riding my 2 speed Hercules with Brett Walker down in the International District and I heard a distinctive "PING". The next thing I knew my moped was wobbling a little more than usual. On further inspection I found that my rear wheel was a funny shape and would have to be replaced. Here is what it looked like after 7 spokes broke.
IMG_6721

I asked around the internet and Vic from the puddle cutters sent me this beautiful mag wheel. Thanks Vic!
IMG_6724

I had a few sprockets to choose from, my Hercules originally came with the huge 50 tooth sprocket on the left and I swapped it out for the 36t in the middle. That sprocket is a little worn out now so my options were either a 44t or a 28t. I went with the 44t and though my top speed will suffer a little bit my low end will now be bangin'.
IMG_6723

The best part of the bike is how clean and beautiful it is. There's nothing distracting about it. Other than the mismatching wheels, the cup holder, the Tomos fairing, the color scheme picked out by a color blind person, ad the clear acrylic clutch plate.
IMG_6726

I also fixed rosanna's headlight and taillight, disassembled a Sachs 505 engine, and swapped air filters on the Pinto. I'm not sure which air filter looks better, I'll give the Uni some time and see if I like it.
Before:
IMG_6732

After:
IMG_6733

:UPDATE:
The Tomos fairing broke on the way home from Moped Monday tonight. Looks like the Hercules wants to be "pretty" rather than intentionally hideous. Either that or it's telling me, "Stop riding me or EVERYTHING will break."

Tune in tomorrow when I resurrect a parts bike into a sleeper speed demon.