
Thursday, May 19, 2011
Why are you still hanging out here?
Hey I've posted a couple of entries over on my new blog location. What are you doing still hanging out here? Go over there, NOW!
Monday, May 9, 2011
Hey, I'm back again!
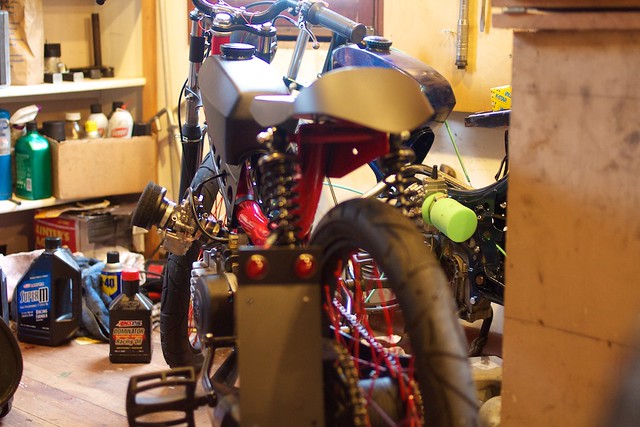
So I was sort of at a brick wall tuning wise until I figured out the whole fire hose of gas spewing onto my pant leg. It's tough to just casually ride a bike and tune it when getting near the thing requires a wardrobe change, a breathing mask, and post ride shower.
So I felt it was important to get myself an air filter to catch as much of that extra petrol as possible. I'm not really stoked on the K&N filters that have been getting popular these days. Though I'm sure they do a great job of high air flow while still filtering, they're just a little too oversized for my tastes.
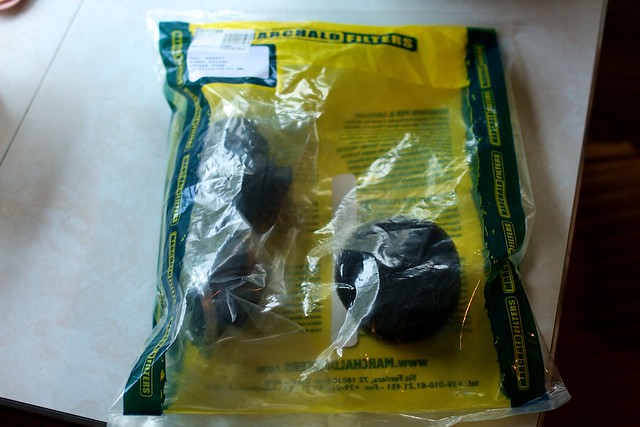
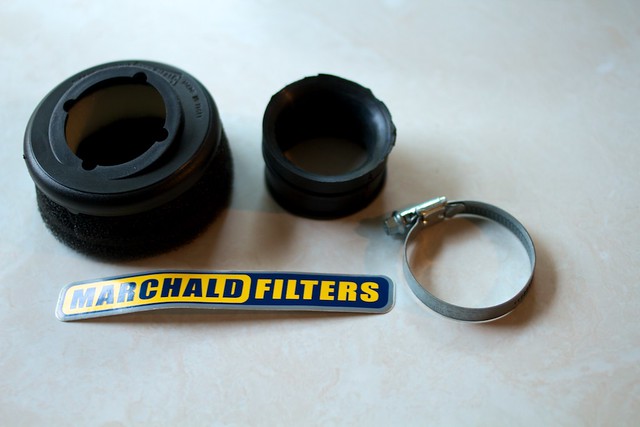
After some searching I came across that Marchald filter I linked to in my last post. WOW! What a great filter. First off, it's really well made. Dual stage foams, metal base, and the rubber adapters that come with it are shaped like velocity stacks to improve the airflow.
I was really impressed at what you get for the price.
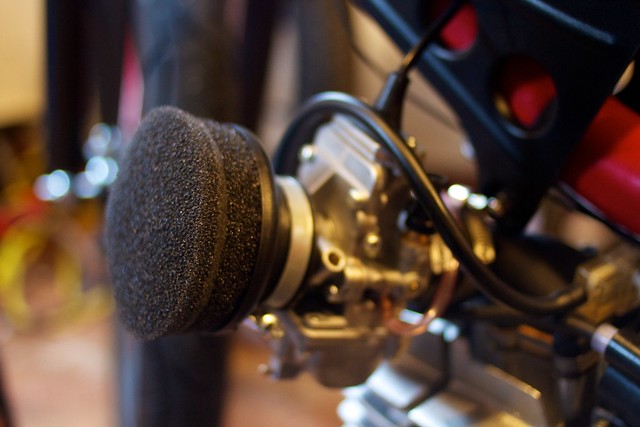
I'll test this out this week.
Just as a reminder, I'm switching my blog over to http://www.joelkvernmo.com/blog. Check it out.
So I felt it was important to get myself an air filter to catch as much of that extra petrol as possible. I'm not really stoked on the K&N filters that have been getting popular these days. Though I'm sure they do a great job of high air flow while still filtering, they're just a little too oversized for my tastes.
After some searching I came across that Marchald filter I linked to in my last post. WOW! What a great filter. First off, it's really well made. Dual stage foams, metal base, and the rubber adapters that come with it are shaped like velocity stacks to improve the airflow.
I was really impressed at what you get for the price.
I'll test this out this week.
Just as a reminder, I'm switching my blog over to http://www.joelkvernmo.com/blog. Check it out.
Thursday, May 5, 2011
Grand Rapids in the HOUSE!!! Literally.
This week was F-U-N. And exhausting.
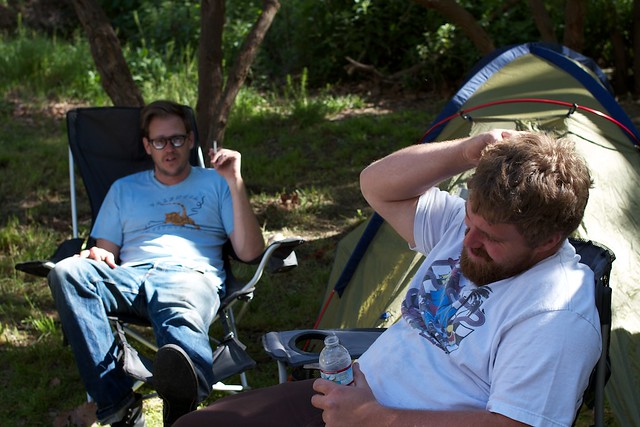
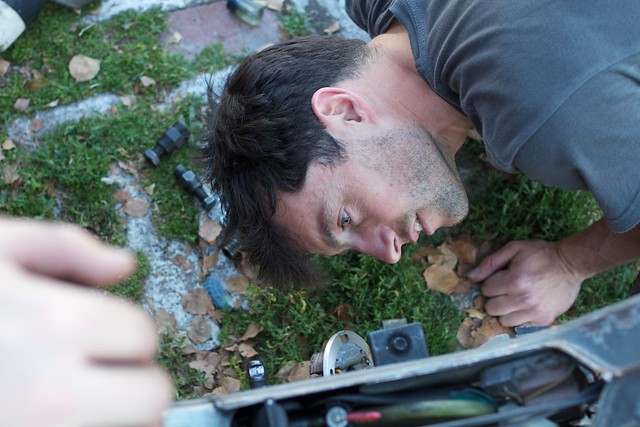
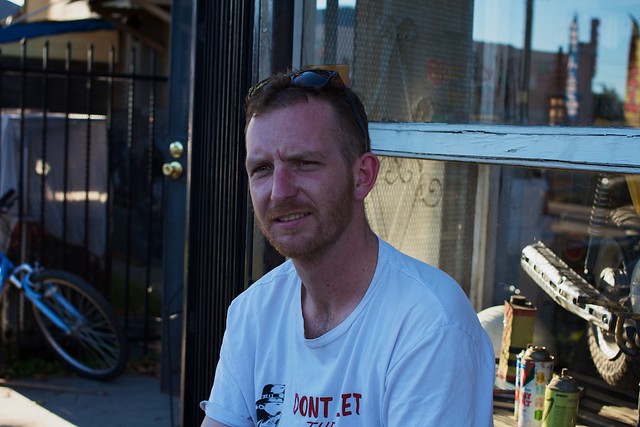
Gabe Bandit along with his friends Derek, Caleb, and Esther came to Seattle because they had a film in NFFTY.
Not content to merely attend a film festival and explore a new city, the Michigan natives decided to participate in a Grand Rapids 24 hour film festival remotely, submitting their project online.
If you're not familiar with the concept of a 24hr film fest, the idea is that participating film-making teams are given a theme, location, spoken line, and prop that must be included in all of the competitors films. Then you have 24 hrs from that moment to create a short film using only footage shot within that 24 hr period.
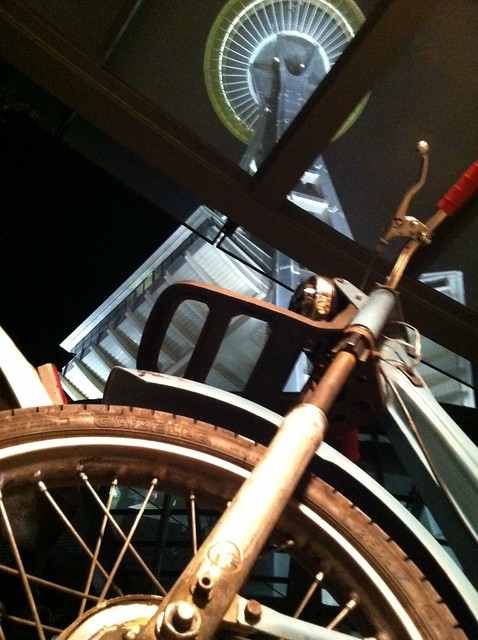
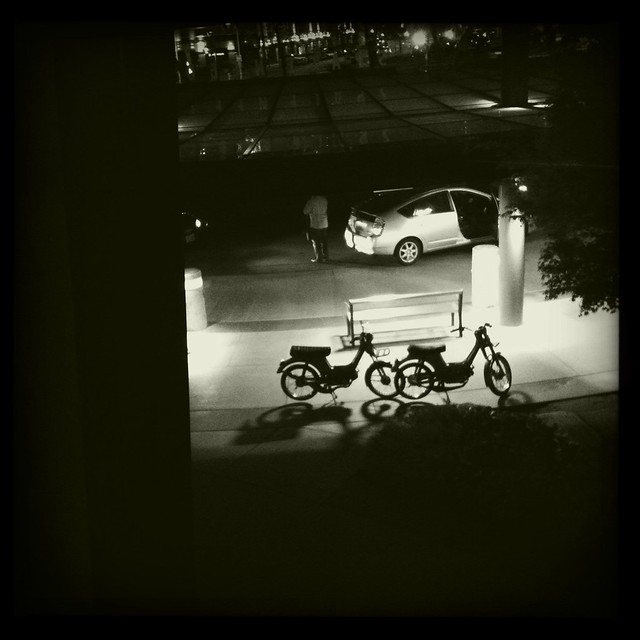
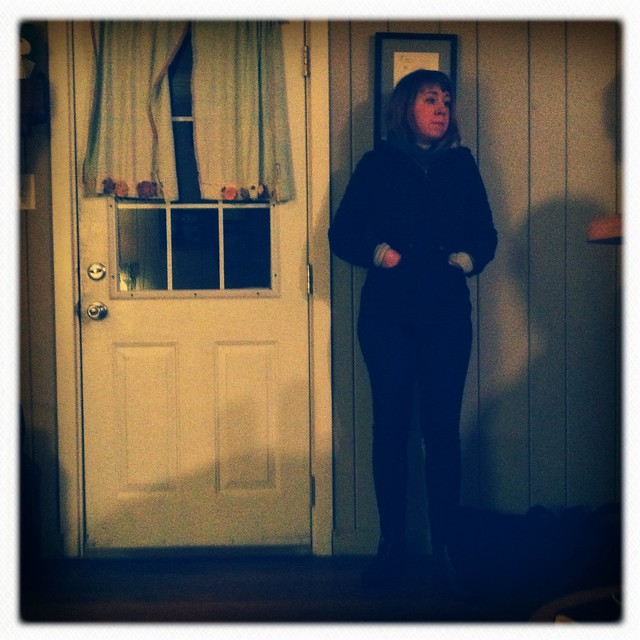
I tagged along and actually became the villain in the movie!
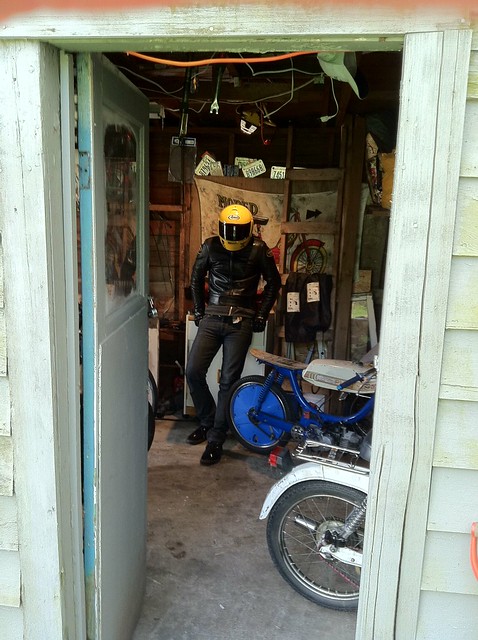
DEATHped made it's riding debut, and after a manic night of riding mopeds all over, and one narrow escape from the authorities, we wrapped filming at 9 am.
The judging for the film fest ends this weekend so once that ends perhaps I can get a vimeo file of the final product posted up here.
Derek, who acted as the Director of Photography snapped some really great shots over the course of the weekend and he graciously allowed me to post them up.
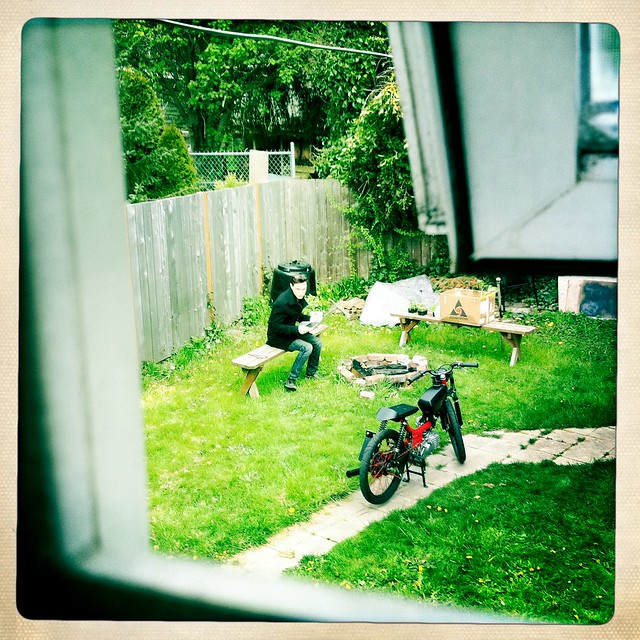

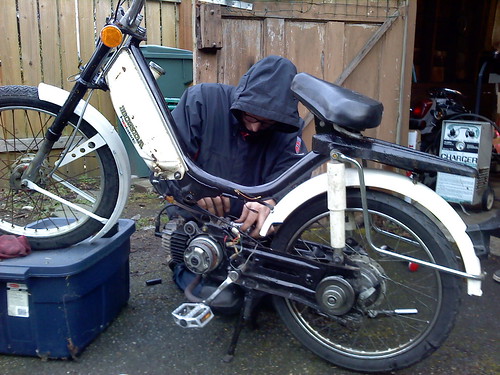
So like I said earlier, right before those crazy mid-westerners invaded Kastle Kvernmo, I finished DEATHped. I rode it quite a bit this weekend during shooting, and on Sunday I did some more fine tuning at a Mosquito Fleet fix-it day. I asked Derek to take DEATHped for a ride so that I could do a plug chop and when he returned he informed me that DEATHped had claimed it's first victim. In his words, "I was riding down 8th and it was hauling pretty good, and this little bird swooped in and it bounced off the headlight and into my visor. This is the final poop of a dead bird."
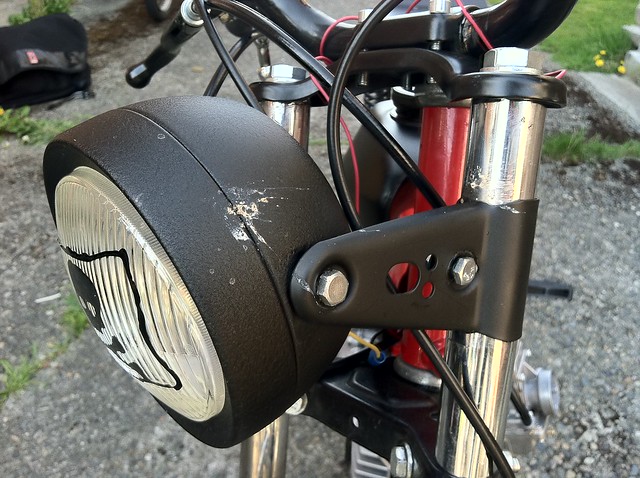
So apparently DEATHped is carnivorous.
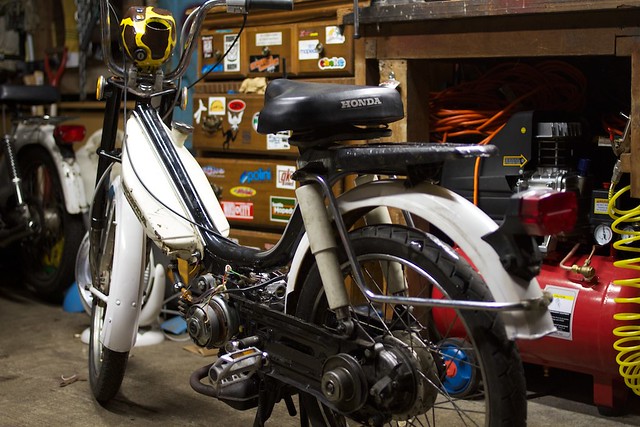
Based on the advice of Naz and Shannon, I'm running it super rich right now, every once in a while I've gotten it to rev up high enough to actually hit the powerband and that's when things get exciting. For the most part though, it just kinda feels sluggy. Once I feel like it is broken in a little bit I'll get the jets a bit more tuned in. I think I may also switch out my front sprocket, I'm running 18 x 45 gearing right now and I'd like just a bit more torque. One thing that I need to change ASAP is the carb needs an air filter. I've heard that Gilardoni kits like to spit gas, but hooboy, my pant leg smells like I've been refining gasoline as a hobby. I walked into a bar and was asked if it was me that smelled like gas, because otherwise they were worried that they might have a natural gas leak in the kitchen. I like this filter and I'll check it out soon.
In other news, this blog is moving. Yes, moving to my other site; joelkvernmo.com. I'm trying to flesh out my site a bit more and I thought it would be nice to take my blog over there. I'll continue posting on both blogs for a little while but at some point I'll abandon this blog and continue over there.
Stay tuned for some rough cut moped footage from the 24 hr film and perhaps the finished product.
Gabe Bandit along with his friends Derek, Caleb, and Esther came to Seattle because they had a film in NFFTY.
Not content to merely attend a film festival and explore a new city, the Michigan natives decided to participate in a Grand Rapids 24 hour film festival remotely, submitting their project online.
If you're not familiar with the concept of a 24hr film fest, the idea is that participating film-making teams are given a theme, location, spoken line, and prop that must be included in all of the competitors films. Then you have 24 hrs from that moment to create a short film using only footage shot within that 24 hr period.
I tagged along and actually became the villain in the movie!
DEATHped made it's riding debut, and after a manic night of riding mopeds all over, and one narrow escape from the authorities, we wrapped filming at 9 am.
The judging for the film fest ends this weekend so once that ends perhaps I can get a vimeo file of the final product posted up here.
Derek, who acted as the Director of Photography snapped some really great shots over the course of the weekend and he graciously allowed me to post them up.
So like I said earlier, right before those crazy mid-westerners invaded Kastle Kvernmo, I finished DEATHped. I rode it quite a bit this weekend during shooting, and on Sunday I did some more fine tuning at a Mosquito Fleet fix-it day. I asked Derek to take DEATHped for a ride so that I could do a plug chop and when he returned he informed me that DEATHped had claimed it's first victim. In his words, "I was riding down 8th and it was hauling pretty good, and this little bird swooped in and it bounced off the headlight and into my visor. This is the final poop of a dead bird."
So apparently DEATHped is carnivorous.
Based on the advice of Naz and Shannon, I'm running it super rich right now, every once in a while I've gotten it to rev up high enough to actually hit the powerband and that's when things get exciting. For the most part though, it just kinda feels sluggy. Once I feel like it is broken in a little bit I'll get the jets a bit more tuned in. I think I may also switch out my front sprocket, I'm running 18 x 45 gearing right now and I'd like just a bit more torque. One thing that I need to change ASAP is the carb needs an air filter. I've heard that Gilardoni kits like to spit gas, but hooboy, my pant leg smells like I've been refining gasoline as a hobby. I walked into a bar and was asked if it was me that smelled like gas, because otherwise they were worried that they might have a natural gas leak in the kitchen. I like this filter and I'll check it out soon.
In other news, this blog is moving. Yes, moving to my other site; joelkvernmo.com. I'm trying to flesh out my site a bit more and I thought it would be nice to take my blog over there. I'll continue posting on both blogs for a little while but at some point I'll abandon this blog and continue over there.
Stay tuned for some rough cut moped footage from the 24 hr film and perhaps the finished product.
Sunday, April 24, 2011
The coolest moped part I've ever made.
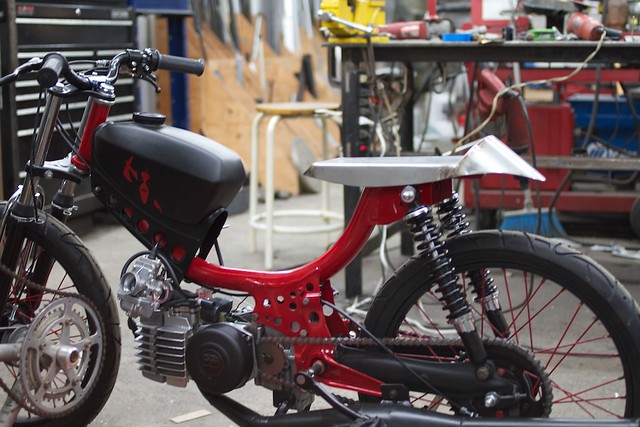
Well, DEATHped is finally coming near to completion. The final missing pieces are in the mail, and I am just putting the finishing touches on the bike.
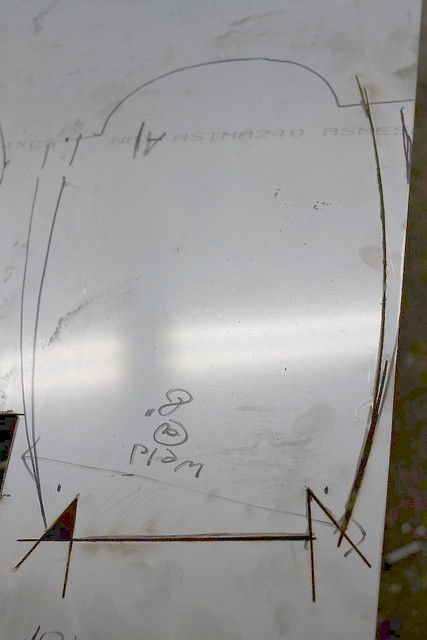
About three months ago, I started visualizing what seat would look best on the bike. I wanted it to be like a cafe seat but minimal, totally unique and sturdy. I started by making a small paper mockup about an inch long. I just sort of figured out what sort of folds I would need to do to make it work. Once I had a mockup, I disassembled the little paper seat and scanned it into my computer. I traced the template in Illustrator and extrapolated it to full scale. Then I printed out the template onto a cereal box, assembled the full size mockup, and tweaked and refined ad naseum.
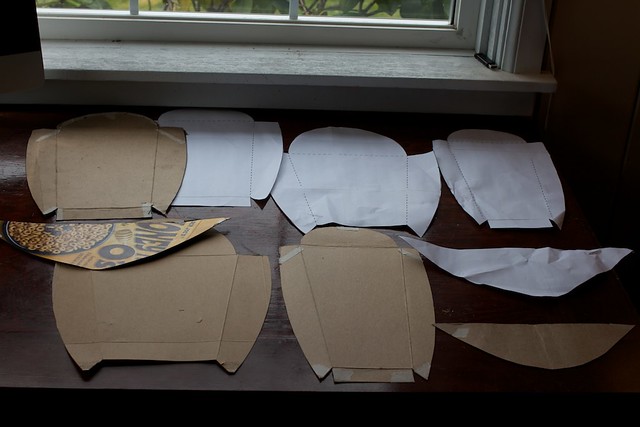
It's really nice to be able to set a cardboard facsimile of a seat on your bike and scope out the lines and work it out. Eventually, I came up with a design I was happy with.
On Saturday I was lucky enough to get some time with Michael Mike down at the wizard lair. That guy is super generous with his time and skills and most every amazing moped project coming out of Seattle has his fingerprints on it. I filled him in on my plan and we quickly set to work.
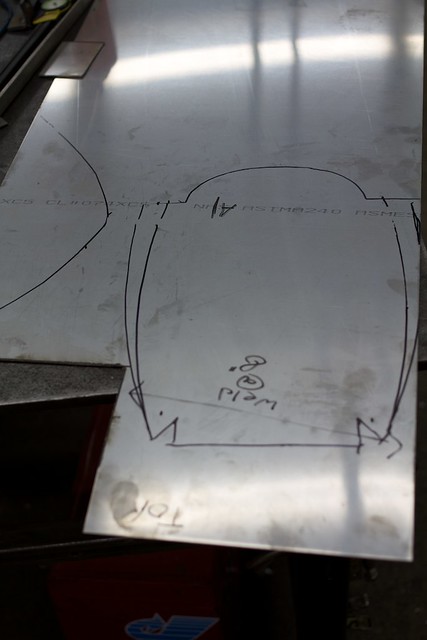
First I transferred my template to the stainless steel.
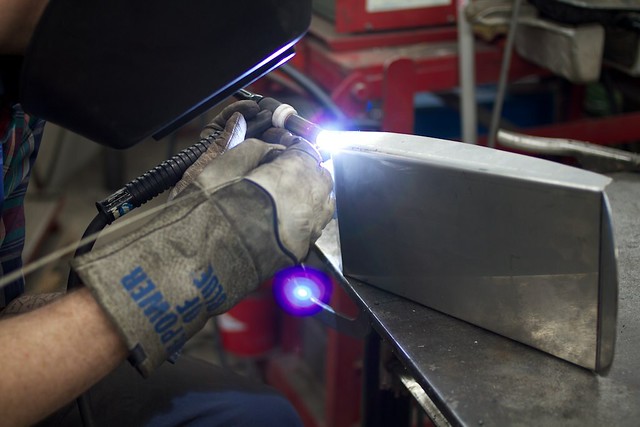
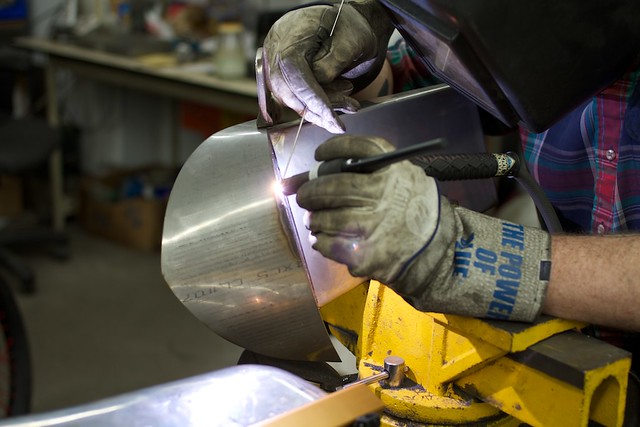
Then I started hacking away with an angle grinder.
The Wizard himself began fusing the metal. If you look closely you'll see that he is actually absorbing the energy of the welder into his hand and welding with his magical fingertip.

After the welding was done I spent a significant amount of time shaping the tail section and this is what I came up with.
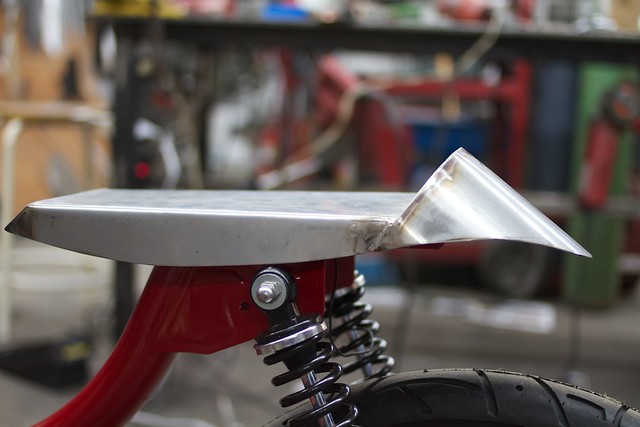
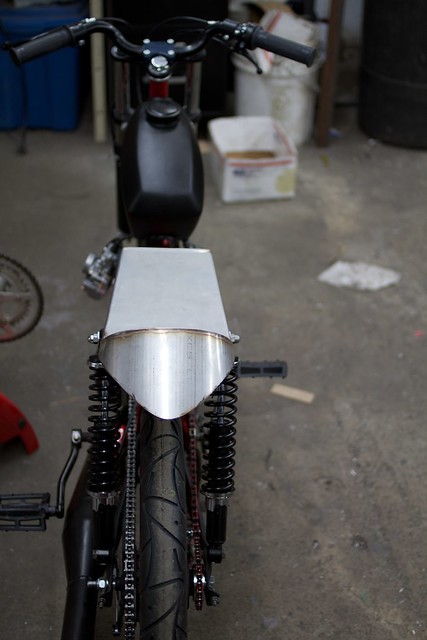
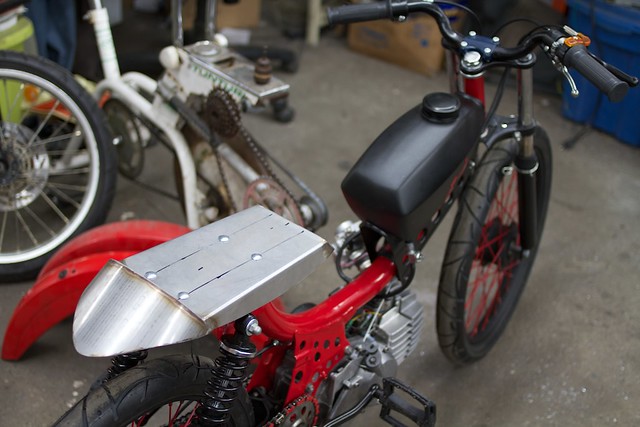
I'm pretty proud of it.
So this leaves me with only a couple more steps before I can declare DEATHped complete and ready to ravage. I'll be tuning the carb and clutch over the next couple of days and my final little bits should arrive today (monday). All that is left is to black out any chrome, (DEATH TO CHROME!) and take pretty photos for posterity. I'm very excited.
I just have to mention one more time that I couldn't have done any of this without the generous help of Michael Mike, Phil, Haulin' Colin, my supportive wife, and probably other people that are escaping my memory.
About three months ago, I started visualizing what seat would look best on the bike. I wanted it to be like a cafe seat but minimal, totally unique and sturdy. I started by making a small paper mockup about an inch long. I just sort of figured out what sort of folds I would need to do to make it work. Once I had a mockup, I disassembled the little paper seat and scanned it into my computer. I traced the template in Illustrator and extrapolated it to full scale. Then I printed out the template onto a cereal box, assembled the full size mockup, and tweaked and refined ad naseum.
It's really nice to be able to set a cardboard facsimile of a seat on your bike and scope out the lines and work it out. Eventually, I came up with a design I was happy with.
On Saturday I was lucky enough to get some time with Michael Mike down at the wizard lair. That guy is super generous with his time and skills and most every amazing moped project coming out of Seattle has his fingerprints on it. I filled him in on my plan and we quickly set to work.
First I transferred my template to the stainless steel.
Then I started hacking away with an angle grinder.
The Wizard himself began fusing the metal. If you look closely you'll see that he is actually absorbing the energy of the welder into his hand and welding with his magical fingertip.
After the welding was done I spent a significant amount of time shaping the tail section and this is what I came up with.
I'm pretty proud of it.
So this leaves me with only a couple more steps before I can declare DEATHped complete and ready to ravage. I'll be tuning the carb and clutch over the next couple of days and my final little bits should arrive today (monday). All that is left is to black out any chrome, (DEATH TO CHROME!) and take pretty photos for posterity. I'm very excited.
I just have to mention one more time that I couldn't have done any of this without the generous help of Michael Mike, Phil, Haulin' Colin, my supportive wife, and probably other people that are escaping my memory.
Friday, April 22, 2011
Blueberry wine, the plague, and Los Angeles
The last few weeks have been a whirlwind of art shows, motorcycle riding, and other fun things.
The Los Angeles Latebirds had a little get together down in Malibu and of course Rosanna and I simply had to attend. I didn't get many photos because I was so busy, so you'll just have to take me at my word that it was a spectacular weekend and I really love hanging with those fellas.
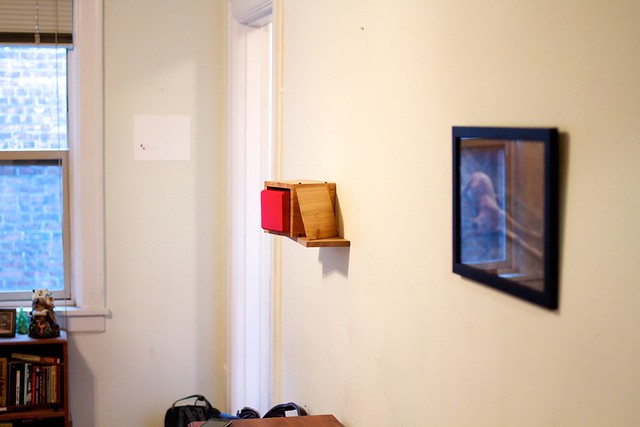
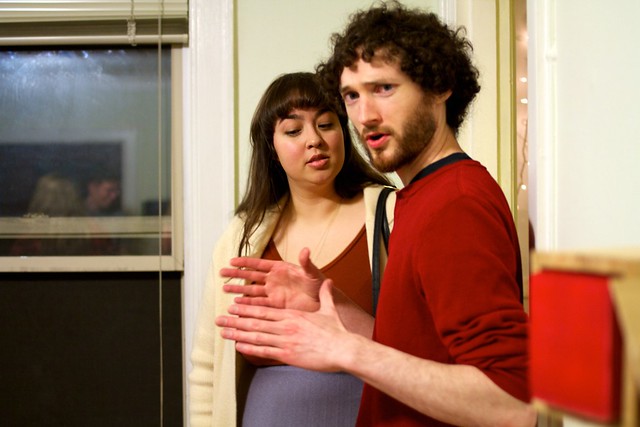
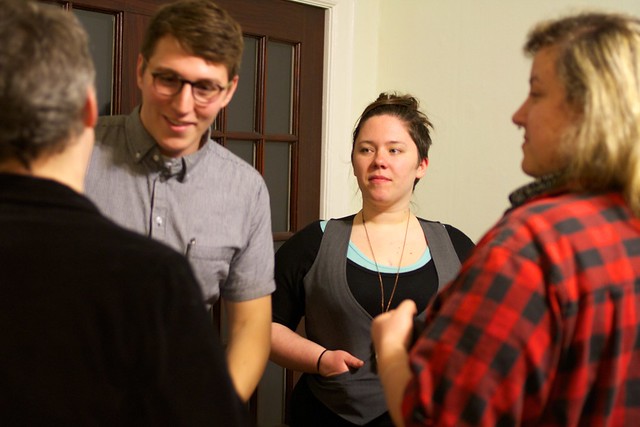
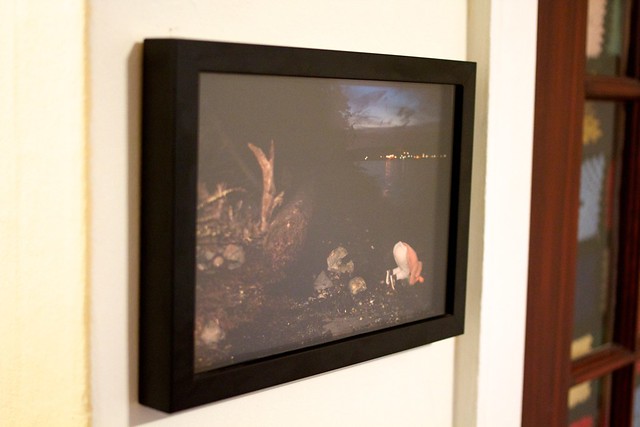
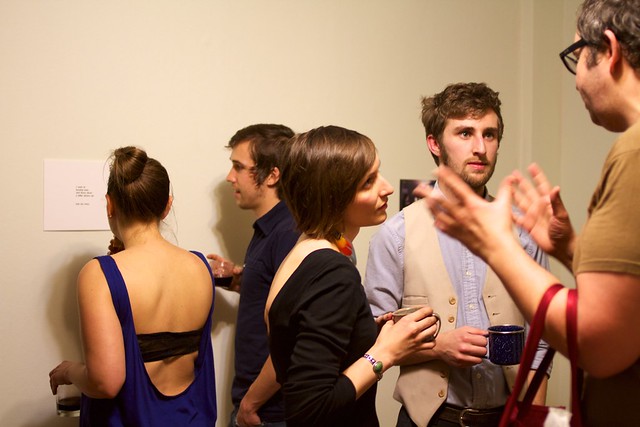
Flashback to a week before LA, my friend Sierra and I had been discussing doing a one night art show in her apartment. She's been doing these shows for some time now, she and her understanding boyfriend pack up most everything in their apartment, put it all in the closet, and host intimate art shows about twice a month. She's been calling it Vignettes.
So, like I said, Sierra and I had been discussing showing some of my work in the future and it became clear that the best time for both of us would be the night before I left for LA. That gave me just about a week to figure out what work I wanted to show and make about five new pieces. My art practice is pretty methodical, I usually have a pretty clear idea of my intention before I start creating, but sometimes it's good to have a deadline hanging over your head to stir the creative juices.
Here are some shots of the Moms on the internet. exhibition.

So the art show happened and it was great, and then we got to spend a wonderful few days with our friends down in LA, and then I got the plague. It started as a little cough and some congestion in my ears and eventually blossomed into full on 24 hour uncontrollable coughing. Oh, and pink eye. It was an awesome week.
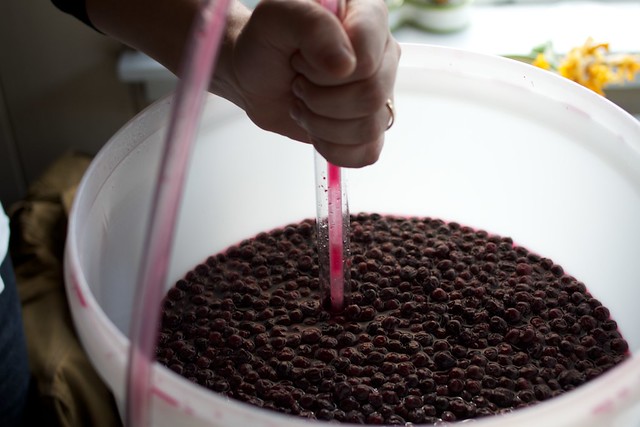
After recovering from my various ailments, my friend Ryan and I racked our blueberry wine.
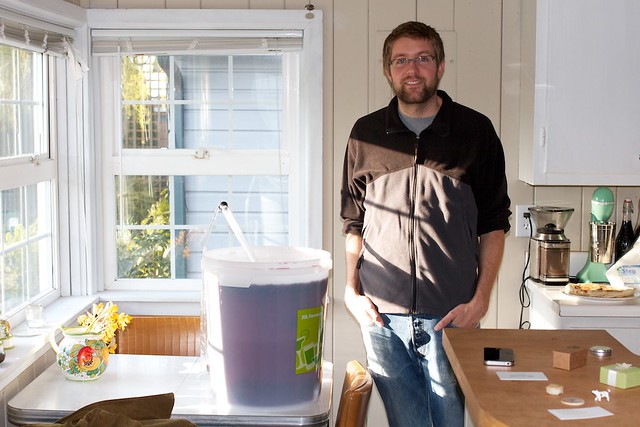
Here is dead-man-walking engaged-to-be-married Ryan with our batch of blueberries. When we began fermentation we combined some recipes and had a comedy of errors sort of day trying to get our ratios right. Eventually we came up with this list of ingredients:
9lbs blueberries
14lbs cane sugar
5 gals water
2 packets of Bordeaux yeast
As of the 13th of April our wine has been slowly fermenting away for 5 weeks and we have an alcohol percentage of 6%. We are shooting for around 14% so we're going to let it continue and hope for the best.
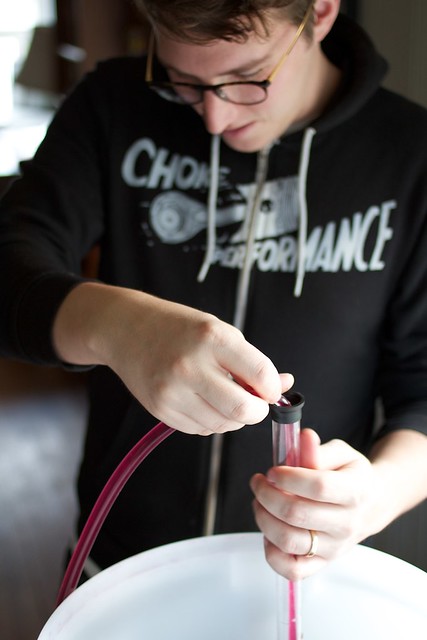
Here I am racking the wine.
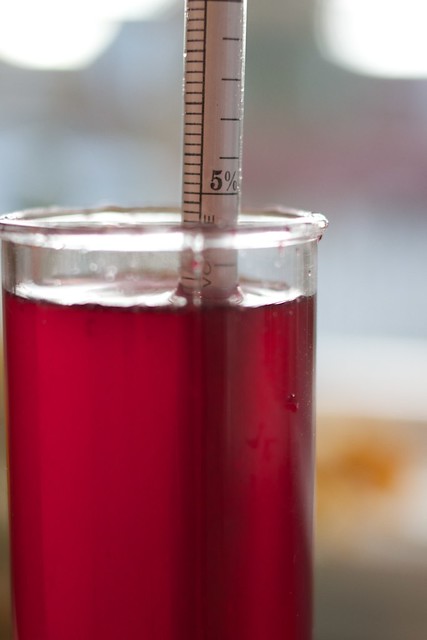
Just look at that delicious ruby color of the blueberry juice. Yummy.
So in summary, life is pretty great! Spring is slowly teasing us here in Seattle, it looks like DEATHped might actually be completed this month, and I've proven that I can survive the plague.
The Los Angeles Latebirds had a little get together down in Malibu and of course Rosanna and I simply had to attend. I didn't get many photos because I was so busy, so you'll just have to take me at my word that it was a spectacular weekend and I really love hanging with those fellas.
Flashback to a week before LA, my friend Sierra and I had been discussing doing a one night art show in her apartment. She's been doing these shows for some time now, she and her understanding boyfriend pack up most everything in their apartment, put it all in the closet, and host intimate art shows about twice a month. She's been calling it Vignettes.
So, like I said, Sierra and I had been discussing showing some of my work in the future and it became clear that the best time for both of us would be the night before I left for LA. That gave me just about a week to figure out what work I wanted to show and make about five new pieces. My art practice is pretty methodical, I usually have a pretty clear idea of my intention before I start creating, but sometimes it's good to have a deadline hanging over your head to stir the creative juices.
Here are some shots of the Moms on the internet. exhibition.
So the art show happened and it was great, and then we got to spend a wonderful few days with our friends down in LA, and then I got the plague. It started as a little cough and some congestion in my ears and eventually blossomed into full on 24 hour uncontrollable coughing. Oh, and pink eye. It was an awesome week.
After recovering from my various ailments, my friend Ryan and I racked our blueberry wine.
Here is dead-man-walking engaged-to-be-married Ryan with our batch of blueberries. When we began fermentation we combined some recipes and had a comedy of errors sort of day trying to get our ratios right. Eventually we came up with this list of ingredients:
9lbs blueberries
14lbs cane sugar
5 gals water
2 packets of Bordeaux yeast
As of the 13th of April our wine has been slowly fermenting away for 5 weeks and we have an alcohol percentage of 6%. We are shooting for around 14% so we're going to let it continue and hope for the best.
Here I am racking the wine.
Just look at that delicious ruby color of the blueberry juice. Yummy.
So in summary, life is pretty great! Spring is slowly teasing us here in Seattle, it looks like DEATHped might actually be completed this month, and I've proven that I can survive the plague.
Wednesday, March 30, 2011
Cider Batch 2 conclusion
A couple of nights ago Rosanna and I opened a bottle of my homemade cider. It was fantastic. Very dry, dense tiny bubbles, and packed a strong kick. It was great. I started initial fermentation on that cider on January 7th, so that means it has been a process of about 2.5 months for the cider to fully mature.
Here is the recipe in bold for posterity, and I'll interject with some explanations throughout.
1-7-2011
4.75 gal Apple Juice
3.75 lbs white sugar
1 packet Champagne yeast
Potential Alcohol 11%
Cloudy orange coloring.
The potential alcohol is measured using a tool called a hydrometer. A hydrometer measures the gravity of a liquid in relation to the gravity of water. In lay-mans terms, water is measured as zero on a hydrometer, sugar adds density to the mixture, which the yeast will eat and turn into alcohol. So in this case my initial reading told me that I had a gravity of 1.081 or 11% potential alc. If the yeast eats all of the sugar, I would end up with an actual 11% alc. content cider.
Within 24 hrs a thick Krausen appeared, after cleaning the airlock a vigorous bubbling started within 72 hrs.
Krausen is the foam that erupts out of a just started batch of cider or beer. Unfortuneately I didn't get a picture of this ciders krausen, but here is someone elses:

(Photo from the Phillyist)
1/30/2011
First Racking
Potential alc.= 1%
therefore actual alc.= 10%
Significant Calrifying,moderate bubbling, strong apple scent from airlock
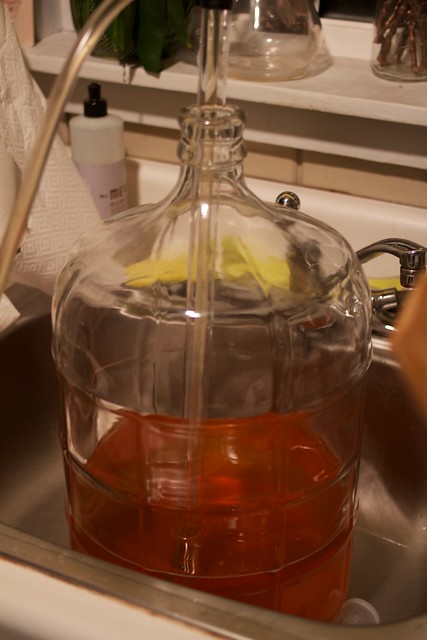
When brewing, the dead yeast and plant matter sinks to the bottom of the carboy. This gunk is called Lees. This is why I started with a cloudy mixture and over time it naturally clarifies. If a brew is left too long on the lees it can acquire what I've seen described on some websites as a "fecal taste". Gross. Racking is the process of moving the good stuff off of the lees into another clean container. Since all of the lees have now settled nicely on the bottom of the carboy it would be counterproductive to just pour out the cider so you have to remove it in such a way that doesn't disturb anything.
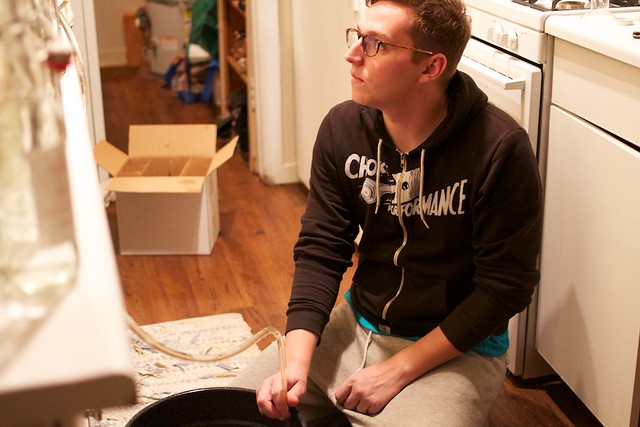
Racking when it comes down to it is just like siphoning gas. One hose goes from the first carboy into another, some sucking action, and everything transfers over nice and easy.

2/16/2011
Second Racking / Bottling
Potential Alc. = .5%
Actual alc. =~11%
added 1 cup corn sugar and 1 cup water for back carbonation
approx. 17 500ml bottles, 6 large mason jars, and a couple of random growlers.
Very clear amber coloring, sweet taste, weak fizz.
When corn sugar is added to a brew at the moment of bottling, the yeast fires up again and starts making CO2. Some people get impatient at this point and add too much sugar or a pinch too much of fresh yeast and the result is referred to as "bottle bombs".
3/27
C'est Magnifique!
Tomorrow I will have post about my next alcohol endeavor, here is a hint:

Here is the recipe in bold for posterity, and I'll interject with some explanations throughout.
1-7-2011
4.75 gal Apple Juice
3.75 lbs white sugar
1 packet Champagne yeast
Potential Alcohol 11%
Cloudy orange coloring.
The potential alcohol is measured using a tool called a hydrometer. A hydrometer measures the gravity of a liquid in relation to the gravity of water. In lay-mans terms, water is measured as zero on a hydrometer, sugar adds density to the mixture, which the yeast will eat and turn into alcohol. So in this case my initial reading told me that I had a gravity of 1.081 or 11% potential alc. If the yeast eats all of the sugar, I would end up with an actual 11% alc. content cider.
Within 24 hrs a thick Krausen appeared, after cleaning the airlock a vigorous bubbling started within 72 hrs.
Krausen is the foam that erupts out of a just started batch of cider or beer. Unfortuneately I didn't get a picture of this ciders krausen, but here is someone elses:
(Photo from the Phillyist)
1/30/2011
First Racking
Potential alc.= 1%
therefore actual alc.= 10%
Significant Calrifying,moderate bubbling, strong apple scent from airlock
When brewing, the dead yeast and plant matter sinks to the bottom of the carboy. This gunk is called Lees. This is why I started with a cloudy mixture and over time it naturally clarifies. If a brew is left too long on the lees it can acquire what I've seen described on some websites as a "fecal taste". Gross. Racking is the process of moving the good stuff off of the lees into another clean container. Since all of the lees have now settled nicely on the bottom of the carboy it would be counterproductive to just pour out the cider so you have to remove it in such a way that doesn't disturb anything.
Racking when it comes down to it is just like siphoning gas. One hose goes from the first carboy into another, some sucking action, and everything transfers over nice and easy.
2/16/2011
Second Racking / Bottling
Potential Alc. = .5%
Actual alc. =~11%
added 1 cup corn sugar and 1 cup water for back carbonation
approx. 17 500ml bottles, 6 large mason jars, and a couple of random growlers.
Very clear amber coloring, sweet taste, weak fizz.
When corn sugar is added to a brew at the moment of bottling, the yeast fires up again and starts making CO2. Some people get impatient at this point and add too much sugar or a pinch too much of fresh yeast and the result is referred to as "bottle bombs".
3/27
C'est Magnifique!
Tomorrow I will have post about my next alcohol endeavor, here is a hint:
Monday, March 28, 2011
Hobbit Makeover
Sometimes I have simple ideas that grow and grow until they boil over into madness.
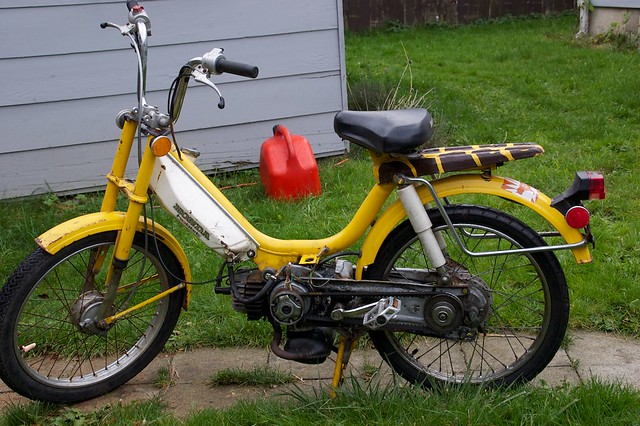
Friday night I was able to successfully install a malossi 70cc kit on my hobbit, Fright Night.
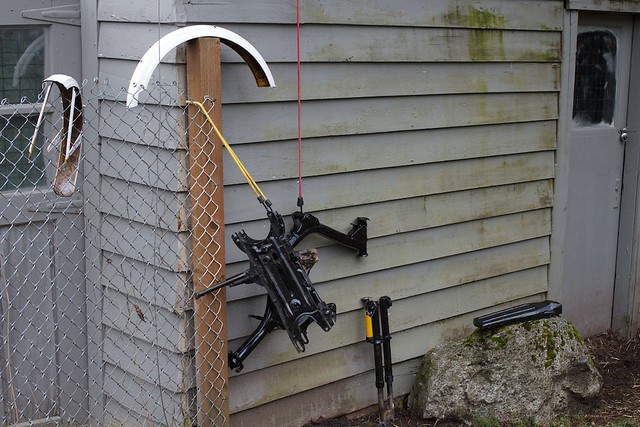
So, when I heard that Brendan was going to be at his home fixing some bikes I naturally thought that it would be a great opportunity to PAINT THE ENTIRE BIKE. Really guys, this is a horrible idea, don't follow my example. If you want to hurt your back, get horribly frustrated multiple times throughout the day, and cause marital discord, by all means, go ahead and disassemble a bike, spray paint it in the rain, and reassemble it all in the same day.
My photo editing software is being weird at the moment so I wasn't able to get the photos off my camera, I'll update this post with more photos later, but here is one picture stolen from Brendans blog.
Before
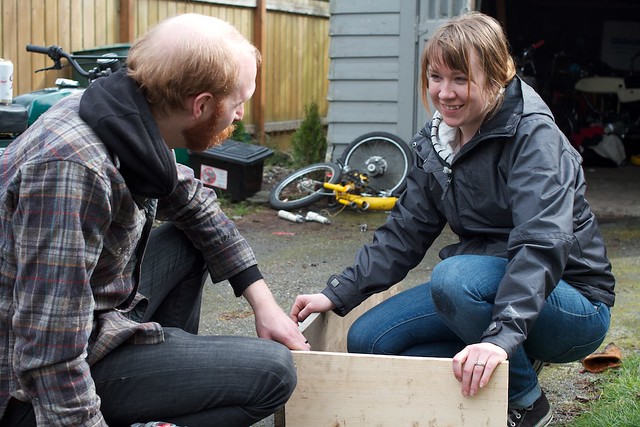
In the background of this picture of marital bliss, you can see my hobbit disassembled, laying in pieces.
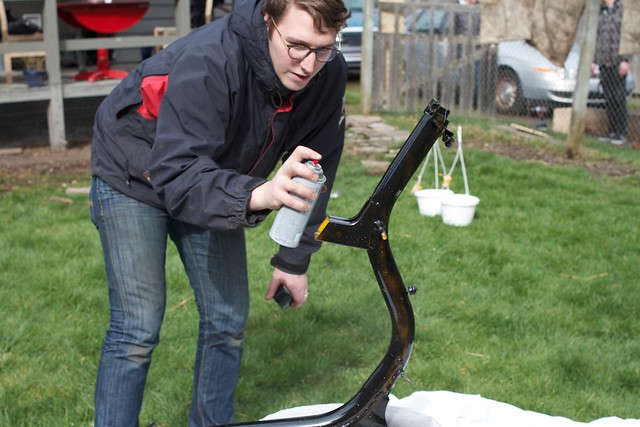
Painting the frame.
Hang drying the painted pieces (in the rain).
Semi-After, I'm still assembling it in this picture.
Note the angry grimace and determined stare. The light sprinkling of rain throughout the whole paint process added a nice splatter paint effect. Try to replicate it, I dare you.
I eventually got everything back together and triumphantly spewed exhaust into Brendans garage.
Juuuust about complete...
COMPLETE!

The following day Travis and Rosanna and I went for coffee and wouldn't you know it, that nice fellow lent me a weakends pipe. I got it bolted up and everything performed beautifully.
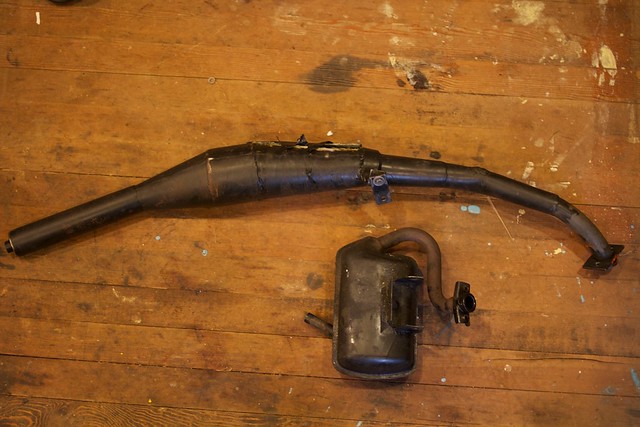
Just look at the difference between the stock hobbit pipe and an aftermarket pipe.
Considering that I traded my hercules for this bike, and Phil gave me the malossi kit sans ring, and some polini clutch springs, Travis is lending me a weakends pipe, and I spent $2 on spray paint... This bike will be very fast and I have spent $9 of my cold hard cash on it.
I still need to do some tuning of the carb before I am confident that I won't seize the cylinder, but all in all it was a very productive weekend.
Friday night I was able to successfully install a malossi 70cc kit on my hobbit, Fright Night.
So, when I heard that Brendan was going to be at his home fixing some bikes I naturally thought that it would be a great opportunity to PAINT THE ENTIRE BIKE. Really guys, this is a horrible idea, don't follow my example. If you want to hurt your back, get horribly frustrated multiple times throughout the day, and cause marital discord, by all means, go ahead and disassemble a bike, spray paint it in the rain, and reassemble it all in the same day.
My photo editing software is being weird at the moment so I wasn't able to get the photos off my camera, I'll update this post with more photos later, but here is one picture stolen from Brendans blog.
Before
In the background of this picture of marital bliss, you can see my hobbit disassembled, laying in pieces.
Painting the frame.
Hang drying the painted pieces (in the rain).
Semi-After, I'm still assembling it in this picture.
Note the angry grimace and determined stare. The light sprinkling of rain throughout the whole paint process added a nice splatter paint effect. Try to replicate it, I dare you.
I eventually got everything back together and triumphantly spewed exhaust into Brendans garage.
Juuuust about complete...
COMPLETE!
The following day Travis and Rosanna and I went for coffee and wouldn't you know it, that nice fellow lent me a weakends pipe. I got it bolted up and everything performed beautifully.
Just look at the difference between the stock hobbit pipe and an aftermarket pipe.
Considering that I traded my hercules for this bike, and Phil gave me the malossi kit sans ring, and some polini clutch springs, Travis is lending me a weakends pipe, and I spent $2 on spray paint... This bike will be very fast and I have spent $9 of my cold hard cash on it.
I still need to do some tuning of the carb before I am confident that I won't seize the cylinder, but all in all it was a very productive weekend.
Wednesday, March 2, 2011
New stuff, and the same old thing
Sometimes when I sit down to write a blog post I think, "this is going to be stupid. The progress I've made is too incremental for anyone else to care about. Does this little bit of work really warrant a whole blog update?" But then I hear Travis' voice saying, "Blog posts should just be like your own journal, don't worry about an 'audience'. It's not for them." Wise words indeed.
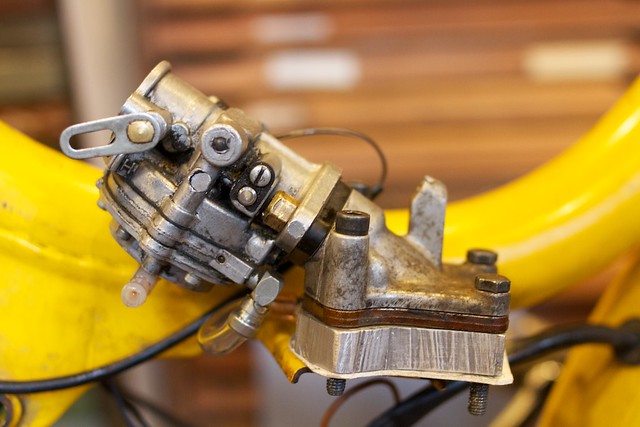
So I got the hobbit or "Fright Night" as I like to call it, running with the tillotson carburetor. I had got everything buttoned up earlier this week, but a series of dumb mishaps foiled my plans. First I drilled and tapped the pulse plate and threaded in the pulse fitting. When I attempted to torque down the fitting my man hands, (ok, AND a wrench) sheared it right off in the plate. Wow, what an annoying feeling.

After a long drive to the nearest hobby store, I managed to get another pulse fitting and I put everything together on the subframe. It was at this point that I realized I hadn't put a gasket under the pulse spacer, and then when I fixed that and dropped the frame down on to the subframe I pinched the fuel line between the intake and the frame causing a major gash in my fuel line. After fixing the fuel line in a janky manner, I pushed the hobbit all around my neighborhood attempting to bump start it and actually got it to fire up and putt a little bit but ultimately decided that I needed to put some more time into the installation before pronouncing it a success.
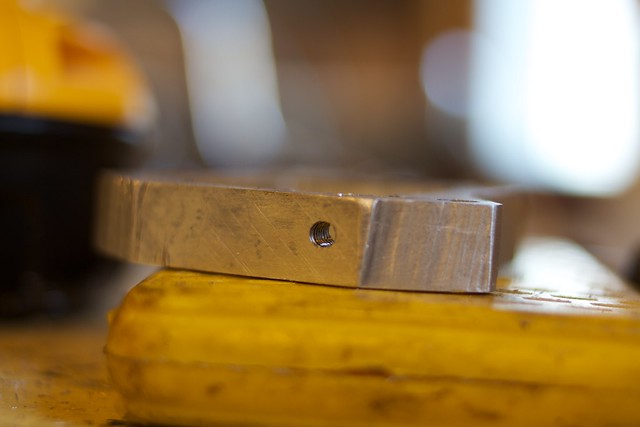
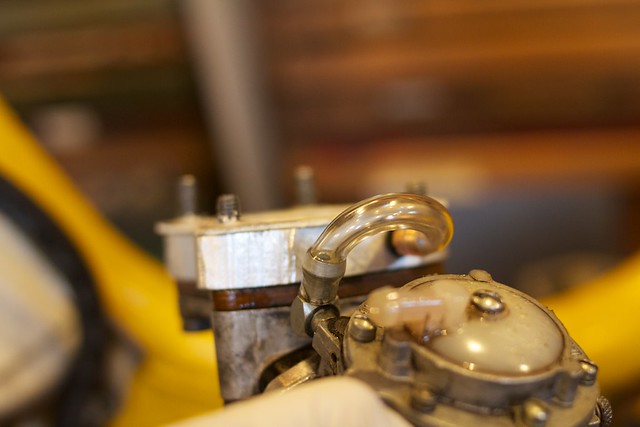
Well, this weekend I took some time and decided to do it right. I procured some actual motion pro fuel line, which I have to say works a lot better than the vinyl crap I usually have laying around. The motion pro stuff has a lot thicker sidewalls so I feel like it is much less prone to kinking. Here is the pulse line all hooked up to the carb.
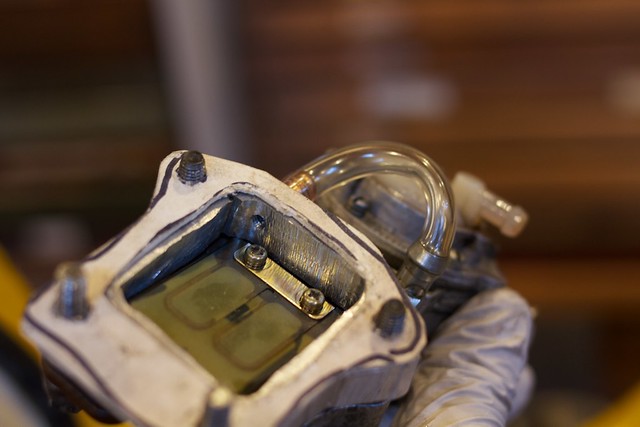
I also decided that my beer-box gasket left a little to be desired so I re-cut another one out of some thick gasket material. Here is the whole carb-intake sandwich right before going into the bike.
I shot video documenting the whole process but when I sat down to edit it I thought, "wow, replacing a carb on a moped, quite possibly the most boring subject possible." So rather than a riveting narrative, I just put it to music and called it good.
And what do you know, it runs! It started right up and goes like a banshee. Well, it goes like a slow banshee with a stock cylinder, stock pipe, and overly large carb. It's a bit gluggy. So now begins Fright Night Stage 2: The Search for a Malossi Ring and Pipe. I can get a ring for the malossi kit very easily but before I put that kit on I should probably have a pipe.
It's a very satisfying feeling to spend months on a project and finally be able to ride it around, but it's an even better feeling when that project can carry your butt up hills and to and from locations dependably for the same length of time it took you to build it. So what I'm saying is, it's all well and good to get this thing running, but the real success will be when I've ridden it for a while and can confidently say that I built it right.
So I got the hobbit or "Fright Night" as I like to call it, running with the tillotson carburetor. I had got everything buttoned up earlier this week, but a series of dumb mishaps foiled my plans. First I drilled and tapped the pulse plate and threaded in the pulse fitting. When I attempted to torque down the fitting my man hands, (ok, AND a wrench) sheared it right off in the plate. Wow, what an annoying feeling.
After a long drive to the nearest hobby store, I managed to get another pulse fitting and I put everything together on the subframe. It was at this point that I realized I hadn't put a gasket under the pulse spacer, and then when I fixed that and dropped the frame down on to the subframe I pinched the fuel line between the intake and the frame causing a major gash in my fuel line. After fixing the fuel line in a janky manner, I pushed the hobbit all around my neighborhood attempting to bump start it and actually got it to fire up and putt a little bit but ultimately decided that I needed to put some more time into the installation before pronouncing it a success.
Well, this weekend I took some time and decided to do it right. I procured some actual motion pro fuel line, which I have to say works a lot better than the vinyl crap I usually have laying around. The motion pro stuff has a lot thicker sidewalls so I feel like it is much less prone to kinking. Here is the pulse line all hooked up to the carb.
I also decided that my beer-box gasket left a little to be desired so I re-cut another one out of some thick gasket material. Here is the whole carb-intake sandwich right before going into the bike.
I shot video documenting the whole process but when I sat down to edit it I thought, "wow, replacing a carb on a moped, quite possibly the most boring subject possible." So rather than a riveting narrative, I just put it to music and called it good.
18 with a bullet from Joel Kvernmo on Vimeo.
And what do you know, it runs! It started right up and goes like a banshee. Well, it goes like a slow banshee with a stock cylinder, stock pipe, and overly large carb. It's a bit gluggy. So now begins Fright Night Stage 2: The Search for a Malossi Ring and Pipe. I can get a ring for the malossi kit very easily but before I put that kit on I should probably have a pipe.
It's a very satisfying feeling to spend months on a project and finally be able to ride it around, but it's an even better feeling when that project can carry your butt up hills and to and from locations dependably for the same length of time it took you to build it. So what I'm saying is, it's all well and good to get this thing running, but the real success will be when I've ridden it for a while and can confidently say that I built it right.
Subscribe to:
Posts (Atom)
