YEAH! Flock Yeah 2 is coming up, we're leaving on Wednesday, so my travel prep is coming along swimmingly. I thought that I had prepared my pinto adequately and was riding specifically for tuning on Saturday. Everything was running good, my bike was nice and peppy, I figured that I was pretty much tuned and ready to go... and then, Murphy's Law struck.
Early in the day on my way to a job interview I got pulled over. The cop was friendly enough, he sort of fell in the baffled category, not really knowing what the law was or what he should do with me. I was pulled over for not having a tail light or license plate. I played dumb and ended up with a warning.
Later, after riding all over town, I was just about home when my moped started making the slow wind down sound. Not a sudden wind down like a seize, more like, "oh-no-I'm-going-to-break-down-please-don't-push-me-any-farther-pupupupuhhhhhhh..." So I pushed it home and it turns out that my roller bearing in my crankshaft blew up and threw needle bearings into the cylinder. It didn't really mess up the cylinder or the piston much more than it already was (I've already seized this kit twice), but it did mess up my rings pretty bad. In my down trodden state of mind I yanked the engine off and began putting a stock engine on. Later on though, Brendan convinced me that I should just throw another ring on there, replace the bearing and try to run it. I'll give that a try today and tomorrow and see if I'm taking the Hercules to LA or if Pinto will live again. I really wanted to bring the Pinto so I could show off the tillotson but we'll have to wait and see.
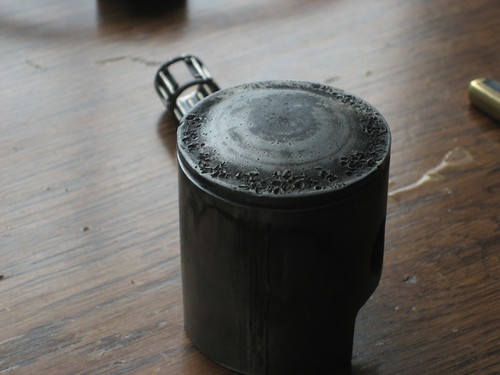
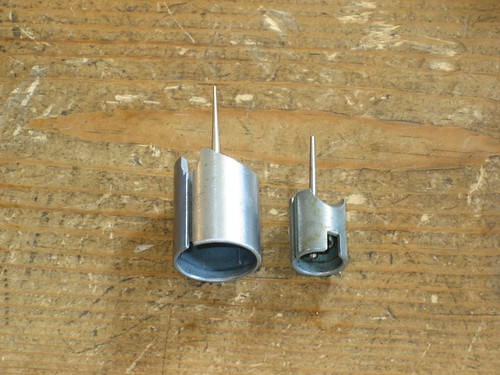
Blued up parts:
In the meantime, here are a couple of videos I made. Fascinating, I'm sure!
If you walk into your local nut and bolt shack, and tell them,
"Hey Bozo, go ahead and get me stainless socket head bolts in these sizes; 4 55mm M5's 4 20mm M6's 8 30mm M6's 4 35mm M6's 5 50mm M6's 8 M5 nuts. Make it snappy or I'll call your manager and complain about your anti-professionalism."
Do that, and you'll have all the bolts you need for your E50 rebuild.
So I thought to myself. I have this General parts bike sitting in the demolished moped shack. I should get it going. since I don't have anything else to do with my day, I tend to attack mopeds trance-like and snap out of the trance when the day is done and I have tranny fluid and grime all over myself.
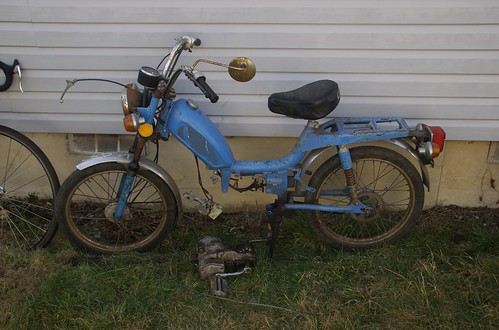
So, El General, as I now am calling it, has come quite a ways. Here is what it looked like when I got it. It was in pretty rough shape.
The first thing I did was to take apart the engine and completely inspect it, clean it, ascertain whether it would need new seals and bearings etcetera. Everything looked good, I unglazed the clutch, everything spun nicely, and I slapped it back together.
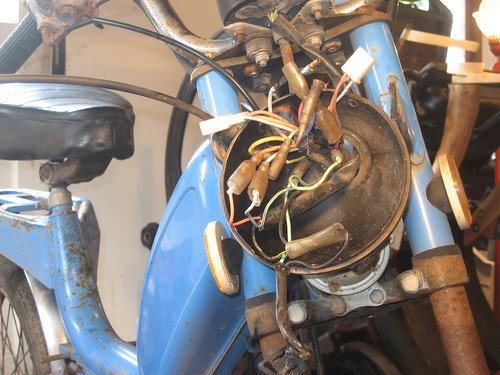
I am constantly amazed at how a moped can be completely trashed but when you crack open the sealed parts- lights, clutch case, electrical, etc.- it all looks immaculate. I took a razor to the tank and scraped off the old sticker residue with great success, I tore all of the blinkers off, as well as the unnecessary wiring and lights and broken handle bar controls. These generals had a really complicated wiring system. No thanks.
So I worked on simplifying and cleaning this bike for a while. I pulled the carb apart and compared the stock 12mm slide to the Dellorto 18mm slide. Man, stock bikes are slow.
We'll see how much progress I make on this bike in the next week. I have big plans for it. 80cc big.
So anyway I attacked my stack of mopeds like a mom shopping for cabbage patch kids. (anyone else around in 1983?)
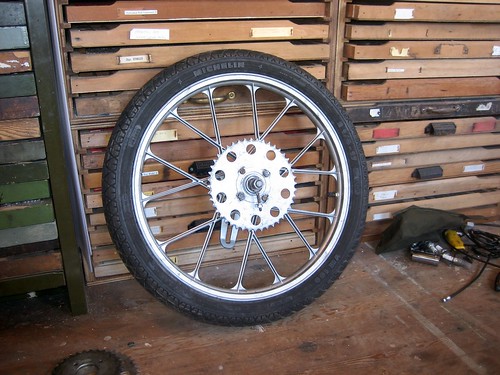
A month or so ago, I was riding my 2 speed Hercules with Brett Walker down in the International District and I heard a distinctive "PING". The next thing I knew my moped was wobbling a little more than usual. On further inspection I found that my rear wheel was a funny shape and would have to be replaced. Here is what it looked like after 7 spokes broke.
I asked around the internet and Vic from the puddle cutters sent me this beautiful mag wheel. Thanks Vic!
I had a few sprockets to choose from, my Hercules originally came with the huge 50 tooth sprocket on the left and I swapped it out for the 36t in the middle. That sprocket is a little worn out now so my options were either a 44t or a 28t. I went with the 44t and though my top speed will suffer a little bit my low end will now be bangin'.
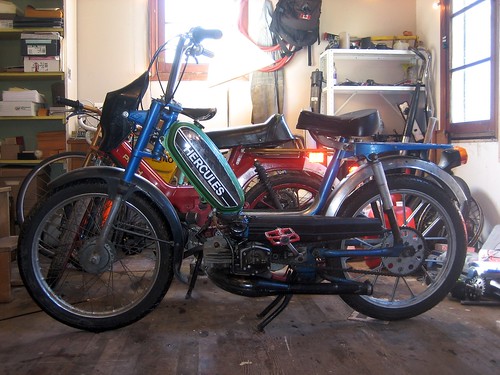
The best part of the bike is how clean and beautiful it is. There's nothing distracting about it. Other than the mismatching wheels, the cup holder, the Tomos fairing, the color scheme picked out by a color blind person, ad the clear acrylic clutch plate.
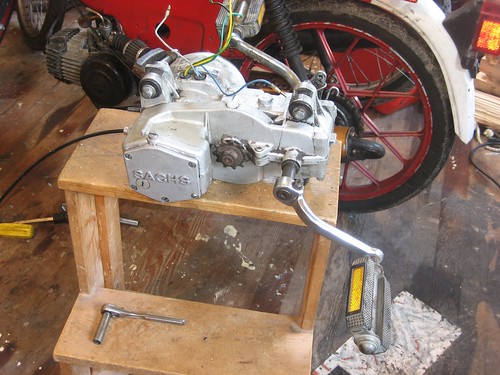
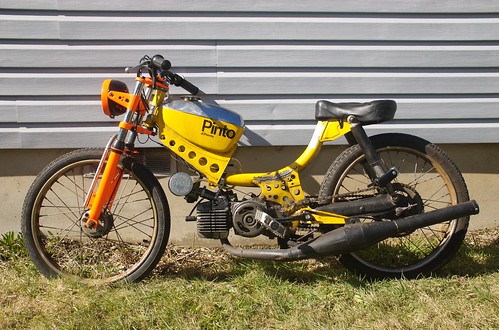
I also fixed rosanna's headlight and taillight, disassembled a Sachs 505 engine, and swapped air filters on the Pinto. I'm not sure which air filter looks better, I'll give the Uni some time and see if I like it. Before:
After:
:UPDATE: The Tomos fairing broke on the way home from Moped Monday tonight. Looks like the Hercules wants to be "pretty" rather than intentionally hideous. Either that or it's telling me, "Stop riding me or EVERYTHING will break."
Tune in tomorrow when I resurrect a parts bike into a sleeper speed demon.
So I rode the Pinto a bit today... I'm getting used to how the carb wants to be treated. It has some interesting quirks, I feel like once the bike is warmed up it pretty much smoothes out but when I first get it started it doesn't want me to dump full throttle on it all at once.
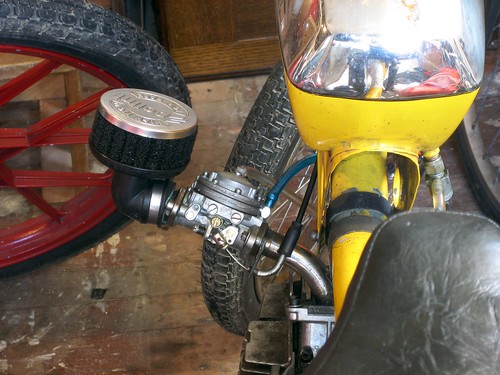
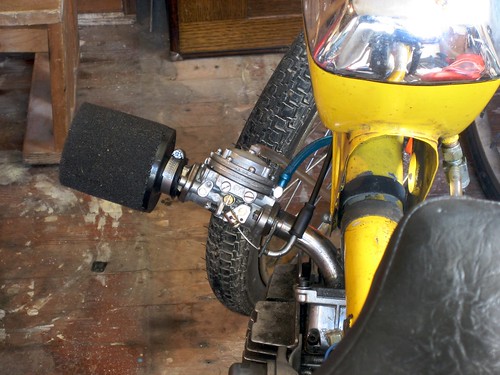
Michael Mike helped me out with a better intake solution and now it should be pretty solid. It looks a bit frankenstein but I think it's appropriate for the bike.
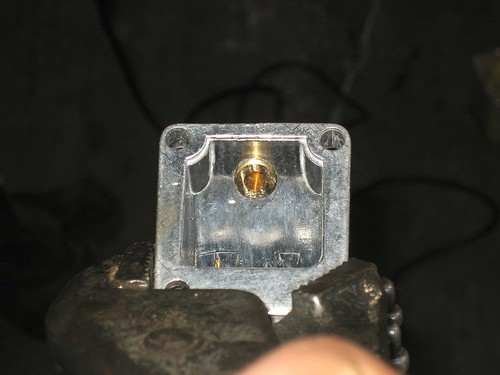
The one thing I need to look into further is the nipple on the intake. It is a little bit janky because I drilled and tapped it in a less than precise environment. I'll put a little JB weld on it and it should be fine.
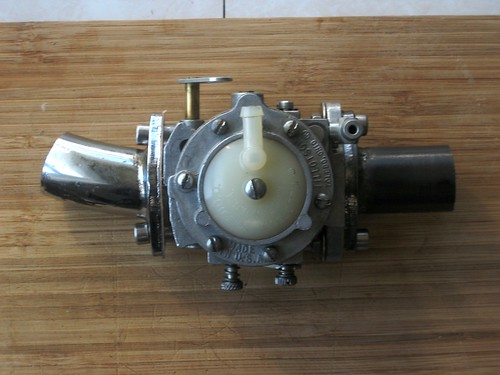
A while ago, Michael Mike mentioned that he was working on putting a carb on a bike that didn't need jets. No jets you say!? So I've been stoked on this idea and have wanted to try it out myself. I have been collecting the necessary parts for the last couple of months, and now that I've done it myself, I'm sure that a determined person could do the whole conversion in a day once they have the carb.
I'll try to explain my process and what I know about the carbs, but bear in mind that I'm a mediocre source of knowledge at best. Tillostson carbs were originally used for things like chain saws, lawnmowers, etc. The main feature of them is that since they are diaphragm carbs, they can be mounted in any position. No float means no dependence on gravity. Eventually, go karts started using them for the same reason.
So I got myself a carb, bought a new gasket kit at the lawnmower store, and rebuilt the carb while riding on the bus!
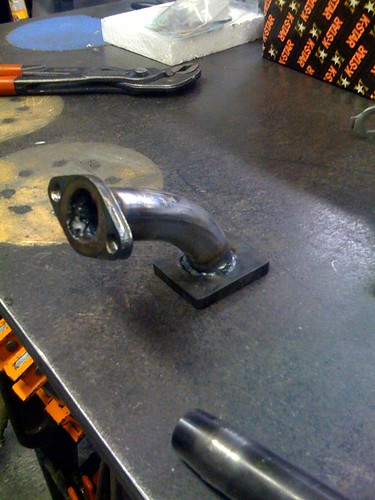
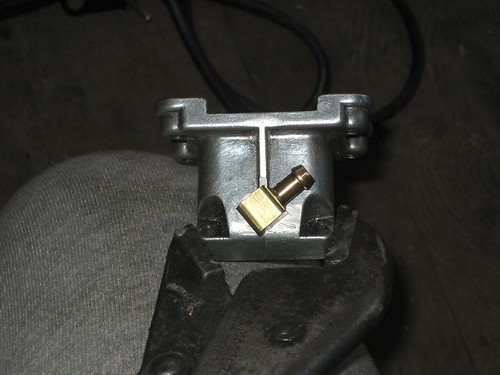
The first problem that had to be solved was the intake mount. Unlike a Dellorto or a Bing, these carbs don't have either spigot or clamp mounts, so we had to make something that would work as a spigot. Luckily, an exhaust flange from a tomos, or puch mounts up pretty much perfectly. So after some cutting, I have two spigots ready to be bolted onto either side of the carb.
I made a couple of gaskets from a beer box and bolted it all together:
Since it's a diaphragm carb I am going to need a pulse line. Since I'm using a 4 petal reed cage, it's going to be super easy. As long as the nipple is tapped below the reeds on the intake I get the same benefit as if I had tapped right into the crankcase. I bought a 90 degree nipple and drilled and tapped my intake, put a dab of grey goo on the nipple, threaded it in, and then dremeled the excess threads from the inside.
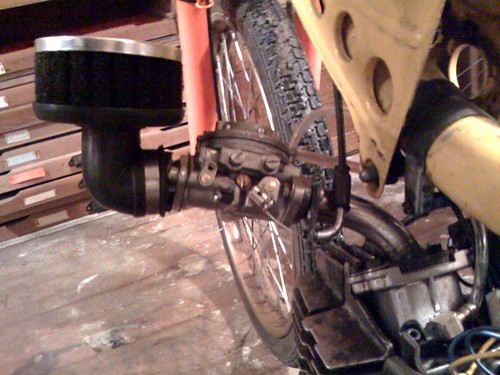
Once that was done I bolted it all together.
Uh oh! Since the carb is mounted forward, the throttle lever wants to be pulled to the rear of the bike. In the future, I am going to mount the carb facing the rear of the bike and this won't be a problem. However, for today, I really wanted this thing running. So I drilled some holes into a piece of sheet metal, and using a throttle cable elbow I was able to get my throttle cable to pull the correct direction. (See my video to see this all in action)
Per Michael Mikes advice, I primed the carb for the first time by loosening all the screws on top of the diaphragm so that the carb would flood with gas a little.
Of course, to my horror, at this point I messed up my throttle cable. The ends became all frayed after I routed it and I was dead in the water. What would moped tuning be unless something miniscule upset the whole process?
I ran to the store and bought a cheap bicycle cable set and using some knarps I was back in business.
Once everything was on, it was pretty much just the simple matter of getting the bike to fire, adjusting the low circuit until it idled, and then riding the bike and twisting on the high circuit until it felt right. Of course it will take some time to get the carb tuned perfect but for now it is certainly ridable. There you have it.
So like I said, I got impatient and just wanted to have this thing running. I slapped it all together and here's what I came up with. The first thing that I did is grind off all the little tabs and things that I wouldn't need. Then I cut off the seat post. I got a little too exuberant and now I'm going to have to add some matrial just below the nose of the seat. All in good time.
Once I got it running I rode it over to ADD Motorworks and had Brad reinforce the motor mounts. I've never heard of this part breaking or seperating from the frame, but I thought, "Well, it could be a potential weak point, might as well give it some more meat."
The carb and intake are a bit janky looking at the moment but I plan on putting a different carb on there anyway. Right now what you are looking at is: -E50 port-matched to polini 64cc -Polini 64cc kit -Polini 4 petal reed cage intake -Rubber hose from Matt Smith -18mm Dellorto PHBG -Polini Air Filter -Motomatic N8p/N6p? pipe I don't know which model it is, I do know that it seems to sit higher on the Pinto than it did on the maxi so I can lean harder into my left hand turns.
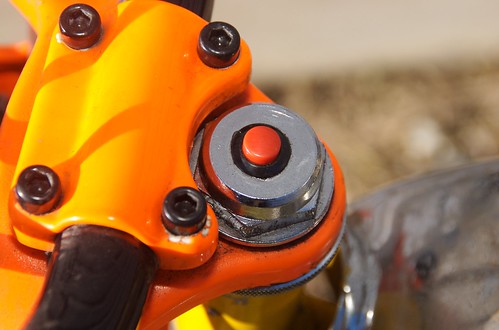
My patented kill switch method. Send me a stem cap and a couple of bucks and I'll make you one too!
Michael Mike helped me make this extra wide pedal shaft. It's not quite wide enough though so I'm still using a bent crank arm on the left side. Its still in the development stage.
When I first got the pinto slapped back together I had some trouble with the carburation and the electrical. My pain is your gain though, here is some video of me pedaling around trying to get it to start (notice the lack of seat... perhaps it was better that I didn't get it to fire up)
So I am going to build up a JC Penney Pinto. I've always really liked the body style and as I've learned more about moped frames I've realized that tube frames are totally where it's at. Pinto's have a great stiff feel to their ride that really snaps through turns. This is my plan in rough order: -Tear down the frame and simplify the look of it; cut off the side panel tabs, reposition the high tension coil, rebuild the bottom end, etc. -Strengthen the motor mount -Install a Tillotson carb -Install a CDI unit -Ride and tune for a while -Tear down again and paint/or powdercoat
Here is what the Pinto looked like when I started: Initially I was going to paint first and build the engine off the bike. But when I got home from California it didn't take long for me to get impatient and just cannibalize most of my maxi onto the Pinto.
Thus far I have already torn down and rebuilt the whole bike and strengthened the motor mount.
I will post pictures of the Pinto's current iteration soon.