It's been a crazy, busy couple of weeks here at Kastle Kvernmo; weddings, Rosannas sisters in town, snow, I started work at Microsoft... somehow we managed to survive it all.
A while back I posted here about my tillotson carburetor experiments. Well, I'm gearing up for another bike project and I think I may have found the perfect tilly carb candidate.
Just for review sake, Tillotson carburetors are whats called a pumper carb. You would typically find pumper carbs on chainsaws, weedwackers, blowers, and recently competition go Karts. While conventional moped carbs such as the (bing, dellorto, mikuni, etc.) use a float bowl and gravity to draw fuel into the carb, a pumper carb uses a diaphragm and a pulse line to pull the fuel into the carb. A pulse line is tapped into the case either right at the crank, or between the reeds and the crankcase near the intake. The diaphragm is sort of like the head of a drum and when the motor is running it creates a pulse which "pumps" the diaphragm, drawing fuel through the carb, and then into the intake. Why would anyone want to go this route rather than the tried and true conventional carbs? Well, first off, it isn't dependent on gravity for its fuel feed, the carb can be mounted in any position. I think that one reason kart racers have adopted the pumper carbs is due to the high speed cornering they do which could cause some issues gravity fed carbs. Another reason is that instead of having to replace jets for fuel mixture adjustment, the carb has mixture screws that jet the carb with requiring any disassembly. This easy jetting feature is what initially drew me to tillotson carbs.
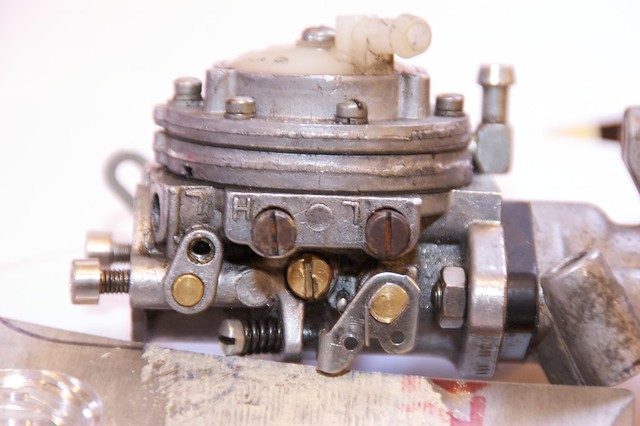
Here is what the high and low circuit jetting adjustments look like:
A little while back I acquired a Honda Hobbit from Phil aka Responsible Jon. Hobbits are great mopeds for a few reasons, pretty stiff tube frame, case inducted, dual variated, and they are relatively easy to find parts for. They do have one obvious downside though, and that is in order to access the carb the whole subframe must be dropped.
See the carb deep inside there? No? Well that's my point.
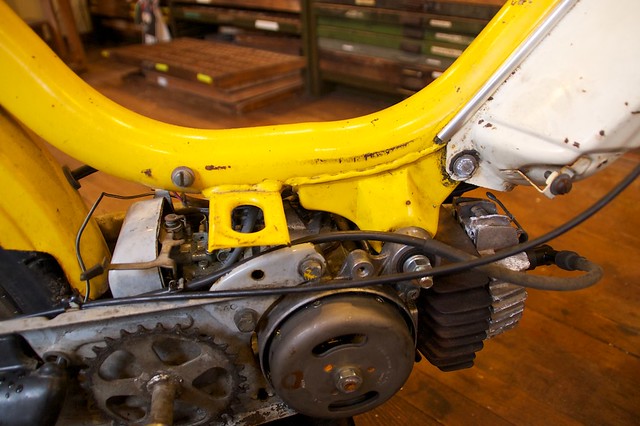
Granted, dropping the subframe is only a matter of one bolt, loosening the throttle cable, and watch out for the electrical wires and rear brake line, but dang, that's a lot more work than your typical carb access on a moped. My solution therefore, is to install a tillotson carb on my hobbit. Rather than tap into the crankcase I am going to make a spacer plate to slip under the reeds and intake. I'll tap and thread in a pneumatic nipple, and bolt it all up. Once I've done this jetting will be easy to adjust and when I decide to swap the stock cylinder for an aftermarket kit or change pipes I'll simply twist the circuit screws to jet accordingly.
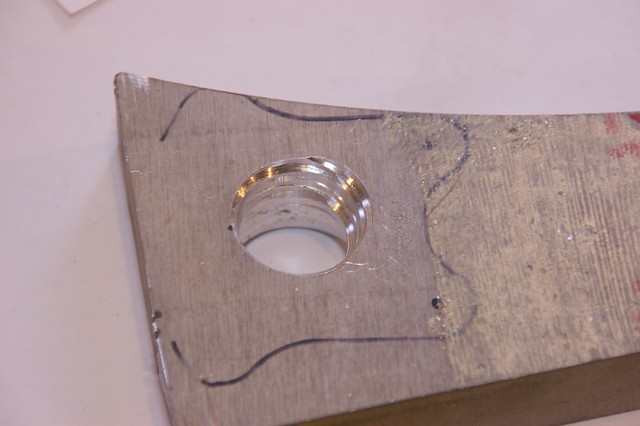
The pulse plate:
As you can see I have traced the outline of the intake onto the block and I have begun removing material from the inside of the plate.
I'm not sure how much vertical clearance I have for my plate inside of the frame. Just eyeballing it, I would guess that the carb could be raised somewhere around a half inch.
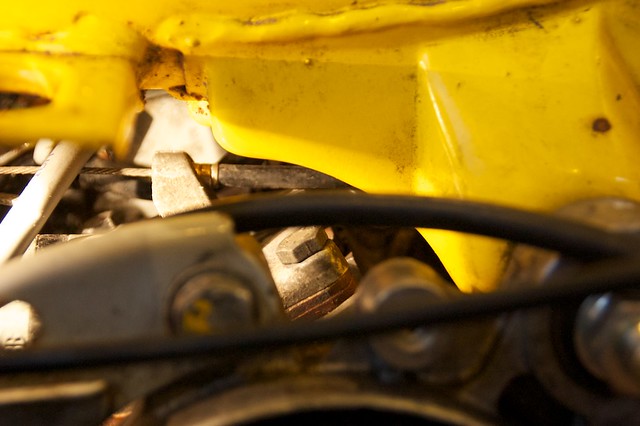
I'm starting with a big chunk of 1" aluminum plate simply because it was laying around. If it turns out to be way too much I can use this as a template for another more modest plate or simply cut and mill it down.
Intake:
Amazingly, the stock hobbit intake mounts almost perfectly to the tillotson flange. I had to ream out the bolts holes a couple millimeters on the carb but otherwise it fits very nicely.
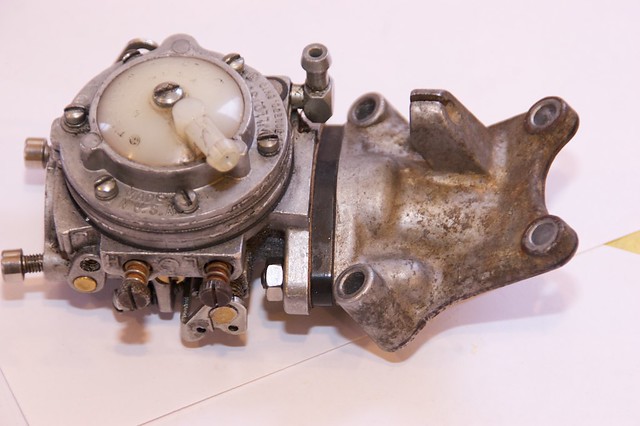
The tilly I'm using has about a 20mm bore but with the butterfly in there we'll call it 18mm.

So I put my dremel skills to the test and opened up the intake to around 19mm.
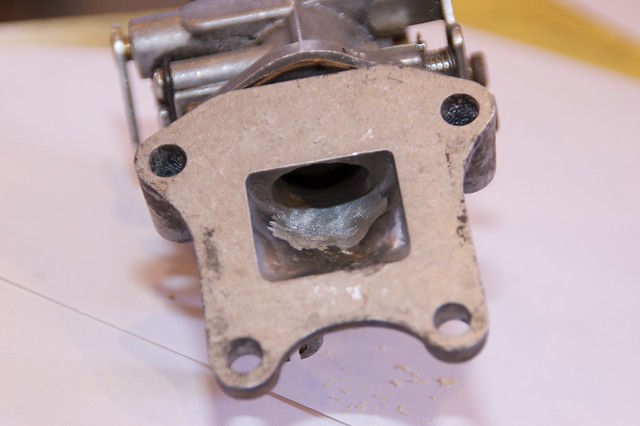
So that's in the works.
In other news, I've been making alcohol. Around Halloween Rosanna and I decided that we wanted to make some homemade Christmas gifts. I've always been intrigued by home brewing and cider seemed like a fairly simple project to get involved in.
So, I bought some cider in gallon glass jugs, got some yeast and airlocks, and started brewing away. I racked the cider at about 1 month and then on Christmas eve I bottled the product. Now, when we gave out the cider as gifts, I told everyone that received one that they should just keep it in their pantry until valentines day. Hopefully by that time the carbonation in the bottle will have built up nicely and the taste will have mellowed. However, based on my observations of my second batch I fear my first batch may not be very good. This second batch is performing SO AWESOME! The yeast started bubbling right away, a foamy ring has formed around the top of the cider, and I can see a lot of CO2 activity going on. With the last batch the fermentation wasn't nearly so obvious which leads me to believe it may not be so great. Here is my batch #2 method/recipe:
1 five gallon carboy
1 airlock
5 gallons of apple juice
3.75 pounds sugar
1 packet of champagne yeast
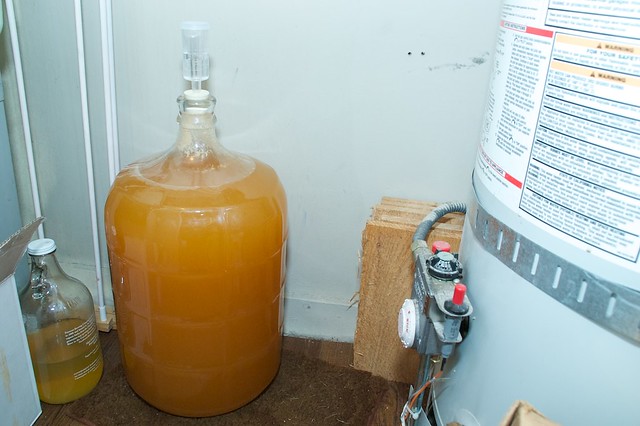
I sterilized everything, poured a couple of gallons of apple juice and all of the sugar into the carboy, and swished it all around for as long as I could in order to dissolve the sugar. I soaked the yeast in a little bowl of water to wake it up, added the yeast and most of the apple juice and sealed up everything with a little bit of vodka in the airlock. My dad got me a hydrometer (and the carboy, thanks dad!) for christmas so I was able to figure that by adding about 3.75lbs of sugar to the 5 gals of juice the potential alcohol content of the final product will be just about 11%. I hate super sweet cider so my goal is to have something akin to a dry apple champagne.
Here is a long video detailing my process:
Here is a short video of the carboy burping CO2. How exciting!
Speaking of "homebrew", last night I was searching for some information about homebrew and I came upon this magical remnant of internet days gone by; Ladies and gentlemen, I present
the greatest website ever made..


