Showing posts with label moped. Show all posts

Wednesday, February 16, 2011

I'm coming out of the lizard closet. I love geckos.

Back in the 90's, Gecko clothing reigned. Everyone (in my very limited circle at 9 years old) had Gecko Hawaii tshirts, they were usually neon of some sort, and had a gecko wearing sunglasses. I'm having difficulty finding a good photo of the old Gecko Hawaii tshirts, but here is a pair of underwear that someone made from the kind of tshirt I'm describing:
(sidenote: this pair of undies comes from a girl that rosanna had a booth next to at a craft fair last year... wierd.)

The awesomeness of the shirts is probably what convinced me that I needed to get a pet gecko. I even hatched a plan to catch a gecko while on a family vacation but it turns out that it is illegal to kidnap and transport a gecko back to Washington. At least that's what my mom told me. Eventually, I forgot about my gecko lust and life went on.

Well, Rosanna and I just returned from a family trip to Hawaii and I'm happy to report that though Gecko Hawaii Apparel is difficult to find, the actual lizards are alive and thriving in Hawaii. Here I am hunting outside our rental house:
photo (1)
photo (2)
And here are some lizard shots that I snapped:
IMG_5603
IMG_5586


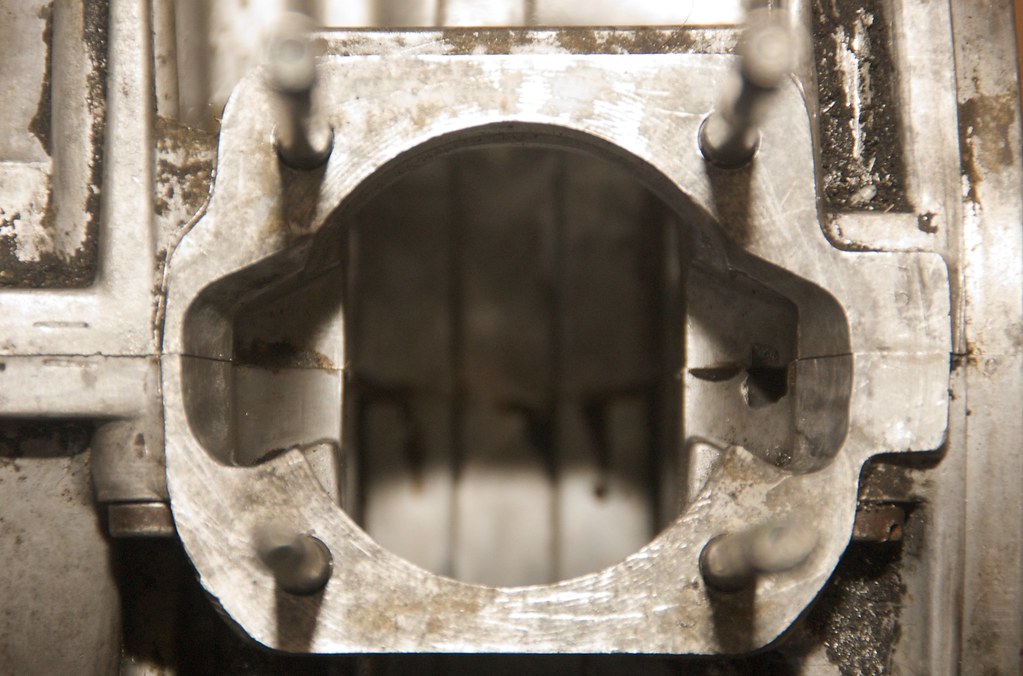
Upon our return I was overcome by an insatiable desire to work on mopeds. Last week, I picked up a 8/32" pneumatic fitting at a hobby store and set to working on my hobbit intake spacer plate (see my previous blog post).
IMG_5697
Typically the smallest fitting that can be had at an auto parts stroe is closer to 1/2" threading which is much too big.
I picked up some 1/2" aluminum from online metals, who, by the way, are really nice guys, most of the time I dig through their scrap and they just give me the materials for free.
The downside to full time employment is that it makes it difficult for me to go visit Michael Mike at the Wizard Lair. Doing a project like this on his mill would take virtually no time at all, but as I can't get down there, I am forced to use a jigsaw, drill and dremel.
IMG_5687
IMG_5690
IMG_5691
It's not beautiful, but it will certainly give me a clue whether I'm going the right direction.
IMG_5693
IMG_5694
Matt Smith has a plate of 3/8" that I may remake this plate out of, I think that 3/8" would be just the limit of how thin I can go and still have threading for the pulse fitting, If I do remake this one more time I should probably use a mill for a proper finish. In the meantime however, I now have a usable prototype. I just need to pull the hobbit apart and decide which side of the plate I want to tap in the pulse fitting.

UPDATE 3/4/2011:
A guy I know was recently spotted wearing this shirt. It's not Gecko, Hawaii, but the spirit is there.
Gecko shirt

Sunday, January 23, 2011

It's not ALWAYS the destination...

...but sometimes the destination is pretty sweet too.
1295822967094
Thanks to Arianna for the picture.
Mopeds are fun. Fun to build, fun to ride, and fun to push beyond their intended limits. But sometimes in our quest to build the fastest, prettiest, and blastiest we lose sight of the fact that without friends to ride with, riding mopeds would just be another kooky hobby like pogo sticks or unicycles.

Sunday, November 28, 2010

Back in the day.

It's winter. So as I spend more time in my house I become increasingly aware of the junk that somehow took root in my house. Rosanna and I are purging clothes we don't need, dvd's, cd's, books, all the kind of stuff a person keeps around because it has some sort of nostalgic value but in reality is just trash cluttering up ones personal space. At the same time, I began doing a digital cleaning of my old hard drives and I stumbled upon some old rough cuts of the moped documentary I started and never finished.
Back in 2006 I was in a video art class, (I believe it was Video 301 or something) and our project for the semester was to make a documentary. I had a friend who was involved in the moped scene here in Seattle so I figured I'd give her a call and see what those scooter things were all about. I followed the Mosquito Fleet around and filmed them doing their thing for a while, I bought my own moped, went to a rally in Arizona, and generally just got to know some great people and had a lot of fun. Eventually, I became less interested in taping and more interested in fixing bikes and riding. I also had a serious lack of confidence as to where the doc was going so I have a few drastically different rough cuts of my footage.

I've currently exceeded my Vimeo limit for the week so I'll update this post later with another video.
Enjoy!

Moped Doc Trailer from Joel Kvernmo

Moped Doc Arizona from Joel Kvernmo

Update:
Another video

Saturday, December 12, 2009

"Blast those kids that think they own the road."

For the last couple of years, my wife Rosanna has been riding the first moped I ever built. It's still a pretty speedy bike considering that the only features that are not stock are the estoril pipe and the 15mm bing carb. Sadly though, it has been looking a little shabby as of late. The paint is chipping, the brakes are bad, and the taillight has fallen off.
Now that my fellow UMMU brother has started up his powdercoating operation, I think that a restoration of this bike will soon be in order. In the meantime though, I've been working on some projects that will hopefully make this bike, as well as all mopedkind less death-trappy.
Today Rosanna and I are in Long Beach, California visiting her Grandparents. You may have heard about Long Beach in some of those rhythm and blues albums all the kids are listening to. In the couple of weeks prior to our departure from Seattle, Rosanna had almost been run over by inattentive drivers a handful of times, so I have been thinking that a REALLY loud horn might do just the trick. So we happened to be at Harbor Freight today, and I was able to score an air horn for $9.99. As I was standing in the aisle in HF, a guy next me said, "Yeah, get that and blast those kids in the cross walk that think they own the road." I looked at him and replied, "I was thinking of the cars that think they own the road."
When we got home I hooked it up using a trickle charger and a dumbbell as a ground.


Now the trick will be to find a good way to conceal the horns and compressor in such a way that it won't detract from the small moped aesthetic. The compressor itself is slightly bigger than a coke can, more like a Fosters can. I may be able to fit it within the body of a moped.

Wednesday, November 18, 2009

Gitter dun.

Let's stop for a moment and agree that "gitter done" is the worst, most inane phrase ever invented by a redneck comedian. It's not funny. IT'S NOT FUNNY!!! People of the world! Put down your KFC bucket and decide to be smarter and more discerning in your comedy choices.

Anyway, rants aside, Phil and I finished the bulk of the moped shed on Monday.

It was during one of the hardest continuous downpours in recent memory, but I was determined to see it through. See the determination on my face?

We put a gutter on the roof so that we wouldn't undermine my neighbors already dilapidated and rotting fence.

The only thing left to do is put a door on one end, wire in some lights and a switch, and put the mopeds back in.

Wednesday, November 11, 2009

Breaking it down for you:

So My friend Lailey recently moved to New York and asked me to breakdown her moped so that it could be shipped over there. I thought, "Hey! I could timelapse the entire process and then there would be a video of a moped being completely stripped online. I don't think I've ever seen that before."

So I went to all the effort of setting up my camera and hooking it directly to my computer so I wouldn't have to record onto tape media, etc.

Everything was going great... and then my computer crashed in the middle of it and I lost all but the first 42 seconds.

Oh well, at least I have a short video of the first time I used my workbench and some video of Rosanna printing some business cards.

Enjoy.

Friday, October 30, 2009

Building in buildings can be fun!

Times are tough, babies.
Unemployment up, cold winter coming, and nothing to do but start fights on the internet. Also, my friend Ian Templeton has left our fair city for Manchester for two years. TWO YEARS! I didn't have the heart to tell him that despite the name, that city will not be the capitol of sizzling hot man chests.

Anyway, last year Rosanna and I moved into Kastle Kvernmo and were delighted to find that with a little bit of effort we could convert the backyard shop into a workable space. Last winter the shop was very cold. It was certainly drier than being outside, but it was not much of an upgrade over the days of yore working on the floor of my very packed garage.
DSC_0089
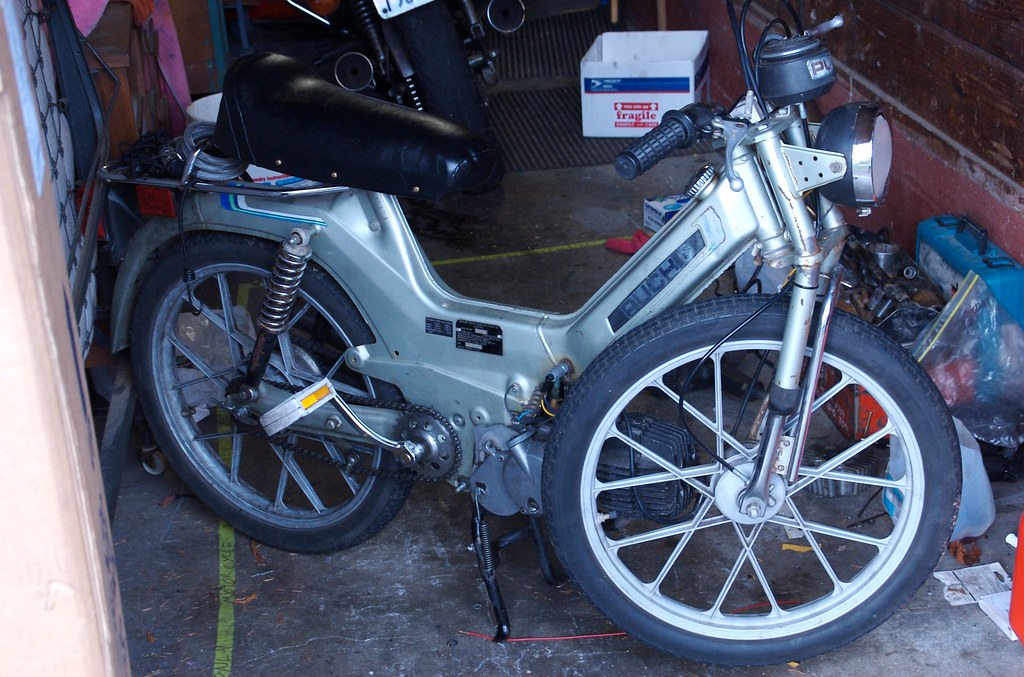
Notice the green tape? That's the "don't put anything other than mopeds here" zone.

Months ago, we started preparing the current shop for the long hard cold. You might recall this short essay on shelves. Well, a couple of weeks ago I insulated the ceiling, had an electrician improve the shop circuit breaker so we wouldn't be blowing fuses, wired in actual light fixtures (no more cheesy clamp-on shop lights!) and changed over from halogen lights to CFLs for efficiency. Phew! (Did I mention that unemployment leaves you with a lot of time on your hands?) But wait that's not all!!!

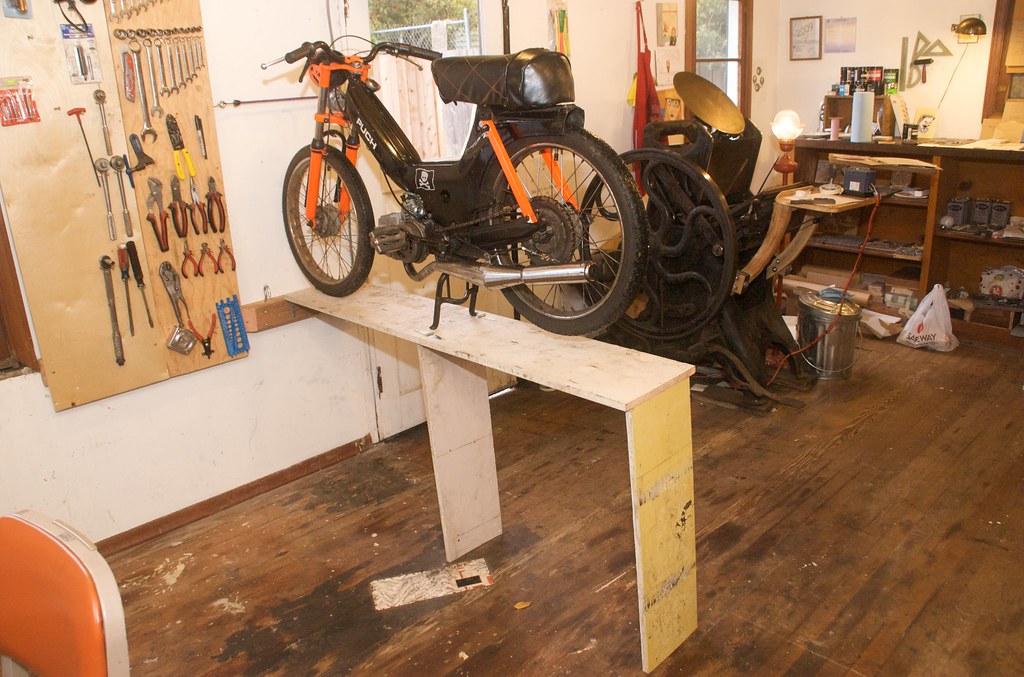
My fellow brother in the Unemployed Moped Mechanics Union, suggested that I build a work bench in my recently polished work space.
DSC_5366

So I spent a while mulling it over and staring at the area that I thought would best accommodate a work bench. I came up with these criteria:
1. It would have to be removable somehow because sometimes large things need to be stored in our small shop.
2. It must be integrated into the handbuilt aesthetic because Rosanna has Iron Curtain Press clients visit the shop frequently.
3. I must be able to brace the bike without a kickstand so that I can drop puch engines.

I thought about how other people make use of small spaces and large furniture elements and I thought, "Good Lord! I'll build a Murphy bed work bench... a 'Murphy Bench'!"
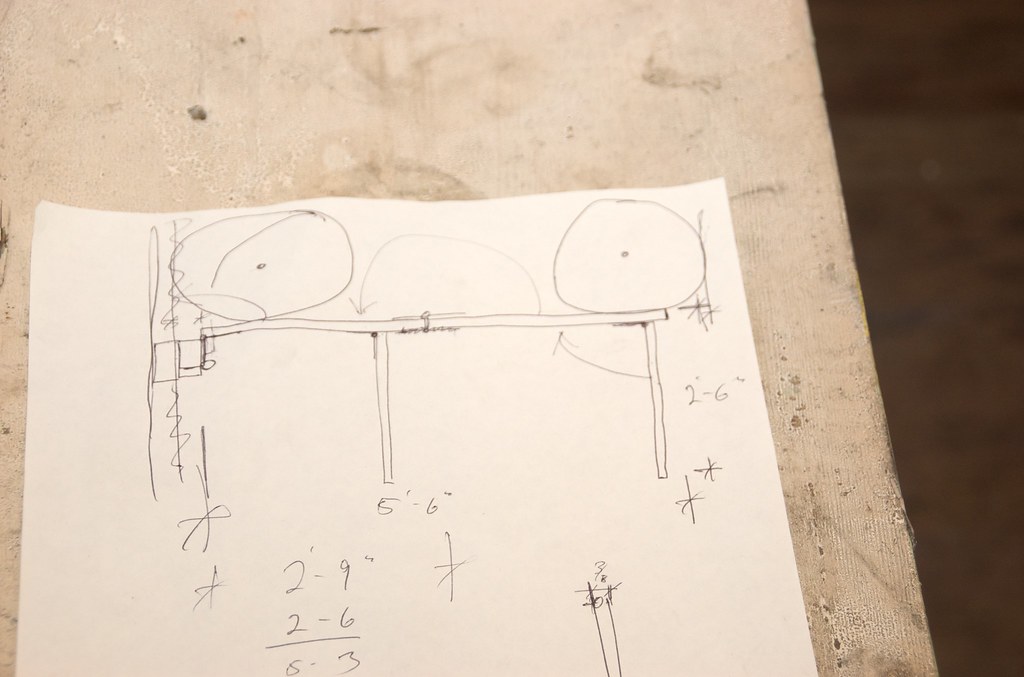
Here is a photo of the plans that my dad and I drew up:
DSC_5444

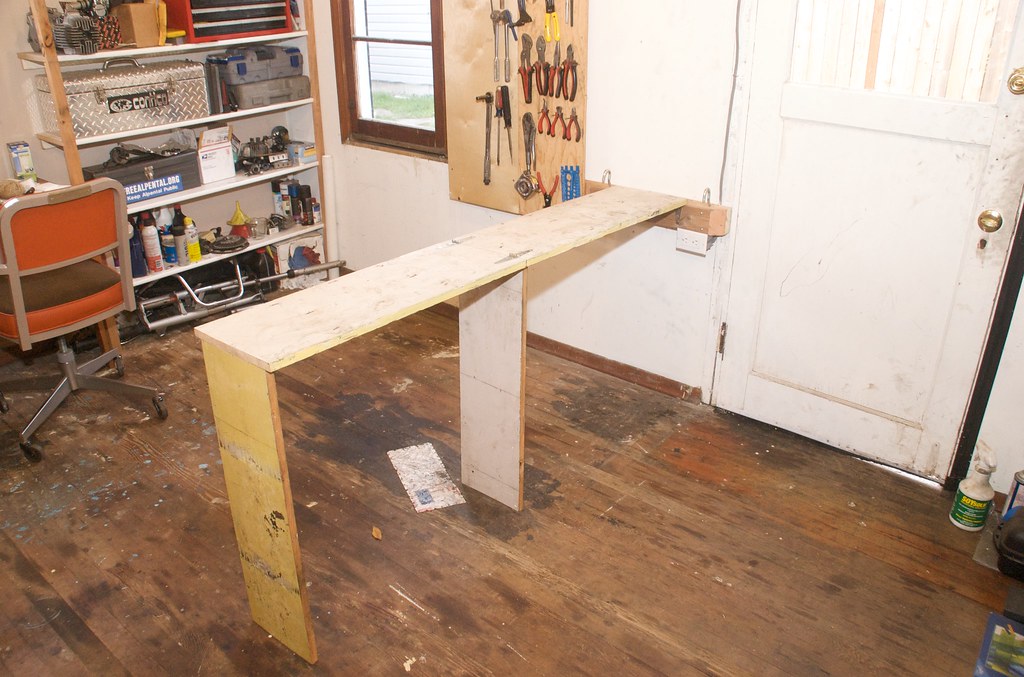
And here is the result:
DSC_5441
DSC_5442
DSC_5452

My favorite part is the outlet that I wired in right under the bench for dremel-or-air compressor-or-sawzall-a-moped-in-half delights. Also, I built in some pretty beefy hooks on either side of the front tire area to accommodate tiedowns, sweet. Responsible Jon claims that my Murphy Bench idea will be the toast of the mid-west. I don't believe that the mid-west has internet.

Tune in next time for "how to make a lean-to into a legitimate garage", and "I'M BRETT WALKER! THAT KIT IS SLOW! YOU'LL NEVER GET IT TO RUN FAST!" Au contraire.
DSC_5180DSC_5114

Monday, May 11, 2009

Blog updates... 2 in 1 day!

Like any anal retentive compu-nerd. I hate two things:
1) When people shorten "anal retentive" to "Anal"
2) When blog people scold you about updating your blog despite their own blogging inadequacies.

The things I love, you ask?
1) the satisfied feeling one gets after making ther web presence nerdier or "better"
2) Bloggin' in my helmet.

blogginhelmet

Check out my new banner and favicon!

Uh Oh Travis...

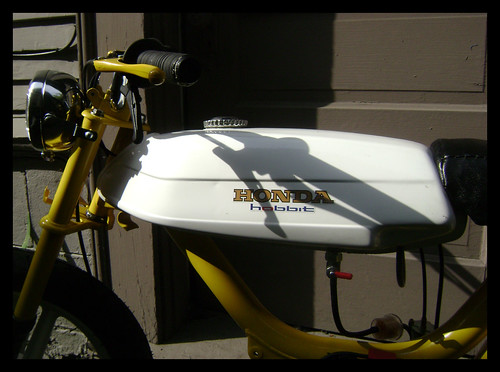
Travis better get that Top Tank Hobbit on the road so he can earn some bragging rights. There has been a lot of talk lately about top tank hobbits on the MA forums. So far they all seem to look like half ass attempts to slap a top-tank onto a hobbit frame and none of them have the really proper finished look and style of a ground-up build. Travis has been slaving away, really taking his time to produce a beautiful and well running "magnum-esque hobbit".

And then today pictures surfaced of a hobbit with a top tank at the Motion Left moped rally this last weekend. Which brings me to the title of this post. Uh oh Travis. Looks like someone out there is actually stepping up the level of detail in the "Magnobbit" competition.

uhohtravis

As I see it, Travis has two advantages in this battle,
1) He strove for hobbit accuracy and painted the whole thing as close to stock as possible. When you look at his bike you have to take a double take to figure out if it is some freak one off Honda product.


2) This other hobbit has a seat on it that says three things, "I bought this from Treats", "It's supposed to go on a 103", "I painted my bike to match the seat."

Ding ding

In the first Magnobbit head-to-head match I pronounce Travis the winner based on originality, detail and accuracy of colors.

Let this be a lesson to us all, the Magnobbits are coming!

Friday, May 1, 2009

Fixing Fixing Fixing

As often happens here at Castle Kvernmo, we have recently run into a veritable moped apocalypse. A steady trickle of things breaking, bending, and rattling off has rendered all of my bikes unridable. (Oddly enough Rosanna's bike is still running strong with nary a flaw.) As I am currently one of the elite persons rich in time and poor in finances, I had to get a bit creative with my moped fixing approach.

First up, the Hercules. This bike is usually a fairly rock solid bike but lately has been showing the results of my daily abuse. I recently noticed that the brake pull rod was bending.

Here's a picture of the poor guy:
janky4

As you can see, the rod has been bent due to two things,
1. My vigorous and often excessive use of the rear brake
2. The lack of a proper pivot piece in the brake arm.

When the brake is pulled the rod needs to stay in a straight line and still allow the brake arm to pivot independently. The pivot piece was never on the brake plate when I bought the bike so I just went without. As you can see, it wasn't a good idea.

So, it's time to make a new piece. The proper way to do it would be to machine something out of aluminum. However, I'm trying to fix it now, not later, so I improvised. After putting around my shop for a while I found a section of brake line that had come out of my doomed Chevy van. It's sort of thick metal and I decided it was worth a shot. So I dremeled the ends and drilled a hole, and voila! a new pivot.

Before:
janky2

After:
janky1

I also worked on the Pinto a bit and got the cdi to work with lights and a horn! Check out the video for more on that...

Janky fixes from Joel Kvernmo on Vimeo.


Also, apparently I broke my stabilizator.
janky7

Wednesday, April 22, 2009

Failure failure failure...

I find myself often ignoring the idea that a stock moped is a dependable moped and a souped (suped?) up moped is likely to be faster but exponentially more likely to break. Why do I do this? Because I'm an idiot that's why. Get off my back, what have you done lately?

Since slapping the Pinto together I have had moments of glory within ages of pure chagrin. Lately, the quest for glory has been to install the new cdi that treats has recently come out with. So far I have spent about a week dicking around on it, timing it, trying various cdi controllers, installing a proper kill switch, etc. I have managed to get it running, however, the incredible performance increase that I was hoping for has actually manifested itself as a mediocre performance decrease. I get about 5-8mph less top speed than I did before and my low end is worse. Hmmm.... I don't think that the fault lies within the unit itself, I suspect that I'm probably doing something wrong and have lately been considering a full breakdown and build up of this bike from scratch.

One major performance issue has been a top speed surging. When I hit the top of my power, rather than it just sort of hanging out there, the bike surges and loses power until I lay off on the throttle a little bit. It was exhibiting this same issue in L.A. and I thought that it was perhaps an issue with the Tillotson carburetor. However, Michael Mike, the mechanic whose example I usually follow, has not seen this problem in the nearly identical setup that he built so now I search for the root of the issue.

A) Fuel Flow
Perhaps I am just not pushing enough fuel through my carb. My petcock is fairly janky and so maybe when I hit the top speed I'm simply not getting enough fuel pushed through the carb. I had a little fuel pump kicking around my shop so last night I thought I'd throw it in there and see if anything improved. I tied it in to the pumper line on the bike and also tied in the fuel line and it didn't seem to effect anything negatively... until this morning when I couldn't start the bike at all. I suspect that over night the carb drained dry and now I need to prime the carb prior to starting it so that I have some suction. Lame. The problem is that I couldn't prime the carb and start it in place because I munched my pedal chain tensioner and had no pedal chain. The fuel pump also didn't seem to effect the surging issue so for now I'm thinking it may not be the fuel flow. Unless it's the petcock that is causing issues...

B) Dented up header on the pipe
My pipe is in pretty bad shape. Not so horrible that it won't run, but it certainly isn't helping things.

C) Seized up blued up kit
My 64cc polini has treated me pretty well if you don't consider the three times it's near-cataclysmically exploded on me. I've replaced the piston once, and the rings twice. It CAN go fast sometimes, but I feel like when you are making fine adjustments on a every other piece of equipment and the main hunk of metal that produces the power looks like it's been chewed by truckasaurus... it might be time to throw in the towel on ol' polini power and buy a cheap kit that I can hack on. "Rosanna, I need to buy a new kit. Do we really need to eat this month?" Probably will not happen for a while.

I think my issues come down to this truth that Responsible Jon so eloquently stated, "Kitted mopeds are only reliable if you are willing to replace EVERYTHING. Even the things that are sort of still working." Essentially, if I want to continue using this crap bucket as a daily rider, I'm going to need set it aside, ride my stockers to work and back and spend time and money slowly on the super bike, taking my time to figure things out instead of plugging the sieve holes one at a time.

I'll illustrate this post with photos of my blued up parts later.

Wednesday, April 1, 2009

Escape from LA

"The three of us were still sitting there, talking aimlessly, when the patrol car suddenly jumped backward, made a tight circle in the parking lot and zoomed off down the highway. I quickly finished my beer and was packing up my tape recorder when there was a tremendous sound all around us. Seconds later, a phalanx of motorcycles came roaring over the hill from the west. Both Gut and Buzzard rushed toward the highway, waving and shouting happily. The road was dense with bikes. The hot dog stand was on the crest of a hill above Bass Lake; it was the last geographic barrier between the Angels and their destination. The police, in their wisdom, had managed to pile up at least a hundred bikes at the roadblock-where the restraining orders were ceremoniously handed out-and then release them all at once. So instead of arriving in quiet knots, the outlaws crested the hill in a great body... howling, hooting, waving bandanas and presenting the citizens with a really terrifying spectacle."
-Hunter S. Thompson "Hell's Angels"

Well it wasn't quite Hell's Angels, and I really hate how journalists automatically compare moped club to them, however, this was certainly the most lawless moped rally I've ever experienced.

On Friday night, after blasting the pack I realized that I had missed a turn. Upon turning around and catching up with the slow pack, I pushed my way to the front along with Carl from the Latebirds. As we pushed up, we realized that the large white SUV was talking to us, "Pull over to the side of the road RIGHT NOW!!!" Naturally, Carl and I looked at each other and knowing full well that the slow bikes would serve as sacrificial lambs, we rode as fast as we could away from the scene. Six or seven other bikes seemed to have the same idea and Carl and I rode through side roads and alleys until we returned to the warehouse. Later, after being assured that the large group was at a bar near by, I struck out on my own. It wasn't long though, until LAPD found me and pulled me over. I don't have a license plate and forgot to turn my tail flasher on so I suppose I was a bit conspicuous. I played ignorant and after learning that I didn't have any priors, I wasn't drunk, and I was from a small fishing village in the north-country called Seattle, they let me go telling me that I was not going to get a ticket, however I was not street legal and that they were aware of the moped presence in LA this weekend.

Over the rest of the weekend there were intermittent police interactions, the one in particular, that made me think of the above Hunter S. Thompson quote, was somewhere near Glendale, we had ridden for about an hour or so, and we were about to ride Angel's Crest. What is Angel's Crest you ask? I wish I could tell you. I heard that it was going to be AMAZING but as we fired up our bikes and were moments from pulling out, word came down that there was a roadblock of forest rangers that had already stopped five bikes. Other than the word "Roadblock" coming into the rally lexicon, that was about as eventful as the Angel's Crest ride got.

The greatest moment in moped-policio interaction came on Sunday night. After a hard day of riding and hanging out, Rosanna and myself and a bunch of other mosquitos were sacking out in the bus when Travis yells, "Oh shit! There is a police helicopter outside and they have Nik and Cam up against the wall at gunpoint!" So I rose sort of Dracula style from my spot in the fron t of the bus and peered outside and indeed there was a full on Rodney King style LAPD assault on a couple of Latebirds. Ok, I suppose technically no one was being assaulted, but there were certainly shotguns pointed at the heads of my friends. Apparently, some smart people who will remain nameless were lighting off fireworks and shooting roman candles at a puddle of gasoline. So after the cops figured out that it was not gun fire but instead fireworks in the ghetto, they told Nik and Cam that they were idiots and then left the neighborhood.

All in all, the rally was the most fun rally I've ever been to. And there are far to many stories to encapsulate in a hundred blog entries.

Thanks Latebirds!

Monday, March 16, 2009

Crazy weather? Friends out of town? Sounds like a fixin' day to me!

So anyway I attacked my stack of mopeds like a mom shopping for cabbage patch kids. (anyone else around in 1983?)

A month or so ago, I was riding my 2 speed Hercules with Brett Walker down in the International District and I heard a distinctive "PING". The next thing I knew my moped was wobbling a little more than usual. On further inspection I found that my rear wheel was a funny shape and would have to be replaced. Here is what it looked like after 7 spokes broke.
IMG_6721

I asked around the internet and Vic from the puddle cutters sent me this beautiful mag wheel. Thanks Vic!
IMG_6724

I had a few sprockets to choose from, my Hercules originally came with the huge 50 tooth sprocket on the left and I swapped it out for the 36t in the middle. That sprocket is a little worn out now so my options were either a 44t or a 28t. I went with the 44t and though my top speed will suffer a little bit my low end will now be bangin'.
IMG_6723

The best part of the bike is how clean and beautiful it is. There's nothing distracting about it. Other than the mismatching wheels, the cup holder, the Tomos fairing, the color scheme picked out by a color blind person, ad the clear acrylic clutch plate.
IMG_6726

I also fixed rosanna's headlight and taillight, disassembled a Sachs 505 engine, and swapped air filters on the Pinto. I'm not sure which air filter looks better, I'll give the Uni some time and see if I like it.
Before:
IMG_6732

After:
IMG_6733

:UPDATE:
The Tomos fairing broke on the way home from Moped Monday tonight. Looks like the Hercules wants to be "pretty" rather than intentionally hideous. Either that or it's telling me, "Stop riding me or EVERYTHING will break."

Tune in tomorrow when I resurrect a parts bike into a sleeper speed demon.

Friday, March 13, 2009

Tillotson Carburetor!

A while ago, Michael Mike mentioned that he was working on putting a carb on a bike that didn't need jets. No jets you say!? So I've been stoked on this idea and have wanted to try it out myself. I have been collecting the necessary parts for the last couple of months, and now that I've done it myself, I'm sure that a determined person could do the whole conversion in a day once they have the carb.

I'll try to explain my process and what I know about the carbs, but bear in mind that I'm a mediocre source of knowledge at best. Tillostson carbs were originally used for things like chain saws, lawnmowers, etc. The main feature of them is that since they are diaphragm carbs, they can be mounted in any position. No float means no dependence on gravity. Eventually, go karts started using them for the same reason.

So I got myself a carb, bought a new gasket kit at the lawnmower store, and rebuilt the carb while riding on the bus!

This guy on an arborists message board did a really good job of showing how to rebuild this carb.

The first problem that had to be solved was the intake mount. Unlike a Dellorto or a Bing, these carbs don't have either spigot or clamp mounts, so we had to make something that would work as a spigot. Luckily, an exhaust flange from a tomos, or puch mounts up pretty much perfectly. So after some cutting, I have two spigots ready to be bolted onto either side of the carb.


I made a couple of gaskets from a beer box and bolted it all together:
IMG_6689

Since it's a diaphragm carb I am going to need a pulse line. Since I'm using a 4 petal reed cage, it's going to be super easy. As long as the nipple is tapped below the reeds on the intake I get the same benefit as if I had tapped right into the crankcase.
I bought a 90 degree nipple and drilled and tapped my intake, put a dab of grey goo on the nipple, threaded it in, and then dremeled the excess threads from the inside.
IMG_6692
IMG_6695

Once that was done I bolted it all together.
IMG_6696

Uh oh! Since the carb is mounted forward, the throttle lever wants to be pulled to the rear of the bike. In the future, I am going to mount the carb facing the rear of the bike and this won't be a problem. However, for today, I really wanted this thing running. So I drilled some holes into a piece of sheet metal, and using a throttle cable elbow I was able to get my throttle cable to pull the correct direction. (See my video to see this all in action)

Per Michael Mikes advice, I primed the carb for the first time by loosening all the screws on top of the diaphragm so that the carb would flood with gas a little.

Of course, to my horror, at this point I messed up my throttle cable. The ends became all frayed after I routed it and I was dead in the water. What would moped tuning be unless something miniscule upset the whole process?

I ran to the store and bought a cheap bicycle cable set and using some knarps I was back in business.

Once everything was on, it was pretty much just the simple matter of getting the bike to fire, adjusting the low circuit until it idled, and then riding the bike and twisting on the high circuit until it felt right. Of course it will take some time to get the carb tuned perfect but for now it is certainly ridable. There you have it.

Tillotson Carb mountup from Joel Kvernmo on Vimeo.

Note: I really could not have done this without help. Thanks for the instruction MM.

Thursday, March 12, 2009

Current iteration

DSC_2977
So like I said, I got impatient and just wanted to have this thing running. I slapped it all together and here's what I came up with.
The first thing that I did is grind off all the little tabs and things that I wouldn't need. Then I cut off the seat post. I got a little too exuberant and now I'm going to have to add some matrial just below the nose of the seat. All in good time.

DSC_2978
Once I got it running I rode it over to ADD Motorworks and had Brad reinforce the motor mounts. I've never heard of this part breaking or seperating from the frame, but I thought, "Well, it could be a potential weak point, might as well give it some more meat."

DSC_2979
The carb and intake are a bit janky looking at the moment but I plan on putting a different carb on there anyway. Right now what you are looking at is:
-E50 port-matched to polini 64cc
-Polini 64cc kit
-Polini 4 petal reed cage intake
-Rubber hose from Matt Smith
-18mm Dellorto PHBG
-Polini Air Filter
-Motomatic N8p/N6p? pipe I don't know which model it is, I do know that it seems to sit higher on the Pinto than it did on the maxi so I can lean harder into my left hand turns.

DSC_2980
My patented kill switch method. Send me a stem cap and a couple of bucks and I'll make you one too!

DSC_2981
Michael Mike helped me make this extra wide pedal shaft. It's not quite wide enough though so I'm still using a bent crank arm on the left side. Its still in the development stage.

Pedaling pedaling endless pedaling...

When I first got the pinto slapped back together I had some trouble with the carburation and the electrical. My pain is your gain though, here is some video of me pedaling around trying to get it to start (notice the lack of seat... perhaps it was better that I didn't get it to fire up)

Pedal pedal pedal... from Joel Kvernmo on Vimeo

...even more pedaling! from Joel Kvernmo on Vimeo.

False starts, restarts, etc.

So I am going to build up a JC Penney Pinto. I've always really liked the body style and as I've learned more about moped frames I've realized that tube frames are totally where it's at. Pinto's have a great stiff feel to their ride that really snaps through turns. This is my plan in rough order:
-Tear down the frame and simplify the look of it; cut off the side panel tabs, reposition the high tension coil, rebuild the bottom end, etc.
-Strengthen the motor mount
-Install a Tillotson carb
-Install a CDI unit
-Ride and tune for a while
-Tear down again and paint/or powdercoat

Here is what the Pinto looked like when I started:
DSC_2832
DSC_2833
DSC_2834
Initially I was going to paint first and build the engine off the bike. But when I got home from California it didn't take long for me to get impatient and just cannibalize most of my maxi onto the Pinto.

Thus far I have already torn down and rebuilt the whole bike and strengthened the motor mount.

I will post pictures of the Pinto's current iteration soon.